Showing posts with label papercraft. Show all posts

Saturday, April 21, 2018

Layout Round Up!

One of my goals for 2018 has been to catch up on my scrap booking. I have been scrap booking since 1990 and up until 2012 I was not behind. In 2012 I got a job outside of the home and it just went to the back burner. I was still taking pictures and my collection of them were growing. I got back into my craft room in 2014, but my focus was on mixed media and card making. I seemed to have lost my mojo for scrap booking, though it is one of the most important things I do for my family -- memory keeping. I think part of the problem was scrap booking was not "in" anymore. So, this year I decided to focus once again on memory making. I am happy to say that I have made a dent in my photos and possibly could catch up in the near future! Here are a few recent pages I have created:


They are an odd assortment of themes, but I scrap when inspired ;-)
Until next time ~ Happy Crafting! 

Saturday, March 31, 2018

Candy Land Cards

One would think with as much time as I spend making cards I would never be without them, right? WRONG! I am always in need of Birthday and Thank You cards. I found the sweetest card kit from Queen and Co called Candy Land! I knew it was perfect! It came with enough materials to make at least 15 cards including a stamp and coordinating die set. Some are shakers and some are COTTON CANDY!!!! This is what I created with the kit:


Queen and Co has been around for as long as I have been into paper crafting. I am extremely impressed with their products and will continue to use them. They have by far the best fillers around for shakers! Check them out by clicking on either of the links provided in this post :-)

Until next time ~ Happy Crafting!

Monday, March 26, 2018

Birthday Girl Yay!

Have you played with modeling paste recently? In a recent Bad Girls Couture Kit a large container of it was included and I had a little fun with it! To create this layout I used everything from the kit!
 I added three strands of ribbon to give the layout texture without adding bulk. I even cheated and only tucked the ribbon into the edges as to not use it all up.
 I used the stencil in the kit to create fun triangles with the modeling paste. After I lifted the stencil I sprinkled glitter on the wet paste. I set it aside to dry. Once it was dry I sprinkled the excess glitter and went over it with a soft bristled brush.
I had so much fun creating the layout of my daughter's 15th Birthday. I mixed up my title and the whole thing came together beautifully!

Until next time ~ Happy Crafting! 

Thursday, January 18, 2018

Heart Chain!

 I am over on the Rinea blog with an amped up Valentine's Day inspired Chain! This is a great way to add a little festive love to your home. You can make a few strips of it and hang it off plantation shutters or your can connect the ends to create a beautiful wreath. Please stop by to see the picture tutorial and say hello!
Until next time ~ Happy Crafting!


Thursday, November 30, 2017

November 2017 Layout Round Up

I am still working on catching up my family album! For November I set goals to complete a set amount of scrapbook pages each week. Here is what I accomplished:
This layout makes me smile because it is three generations. The picture was taken last summer on a trip back home in which I got to met my nephew for the first time. 

I finally got last year's Christmas cookie decorating page done:

The following is not a layout, but an art journal page I created. I have been struggling with some self worth issues lately. I journaled about my feelings in the background by rotating the journal 90 degrees after I filled up the page. The colors and look represent how I have been feeling internally.


Sunday, November 19, 2017

Warm Cozy Wishes

I splattered Colorburst on a Kraft card base to start this perfect card for the coffee fall lover! The little coffee is from the Cozy Coffee Stamp Set. I colored it in with Studio 71 colored pencils and cut it out. I layered two pieces of washi tape and then sentiment on top. I used pop dots on the coffee and finished it off with some gorgeous scarlet colored gems.

The stamp set and Colorbrust can be found in the Brutus Monroe Shop

I also am on the blog today so make sure you stop by and say hi!

Until next time ~ Happy Crafting!

Saturday, November 18, 2017

Fall Hostess Thank You Tag

I am over on the Rinea Blog today sharing a lovely tag that would be perfect on a card, gift bag or bottle of wine!
Make sure you head on over to see a ton more inspiration! This is the best paper for holiday paper crafting and decor! 

Until next time ~ Happy Crafting!

Thursday, November 16, 2017

Christmas Cards for a Swap

I signed up to partcipate in a Christmas Card Swap! I created a total of 20 cards to exchange with other artist around the country. I showed the first set at the end of October and wanted to feature the last 8! This set coordinates with one another because it is from the November 2016 Spellbinder Card Kit! I found their booth at the Pinner's Conference in October. They had a special in which you could buy two past kits for $30 -- that is only $15 a kit! When I saw how fun and whimsical this kit was I knew I wanted to play with it. There was so much packed into this kit that I had a ton left over. Here are the nine cards I created:


Not only did the cards turn out darling they came together super fast! 

Until next time ~ Happy Crafting!

Sunday, November 12, 2017

Life is Short and the World is Wide

My new obsession is Ken Oliver's Colorburst for Brutus Monroe. I used it to create the backdrop for the sweet little campers and sentiment for this card. I stamped three of the five trailers from the Road trip Brutus Monroe Stamp set, colored them in with Style-file markers, and cut them out on my Brother's Scan N Cut. I layered my colorburst piece on white card stock and adhered to a black card base. I used pop dots to adhere the trailers. I stamped the sentiment with surface ink and layered it on a small colorburst strip. I finished it off with little acrylic bubbles.

You can find all of the supplies to create this card at Brutus Monroe. I am also on the blog today so pop over and say hi!

Until next time ~ Happy Crafting!

Thursday, November 9, 2017

Making Color Burst Cards

I had the privilege of meeting Ken Oliver at the Mixed Media Convention in July of 2017. I got a one on one demo and lesson on how to use Color Burst and have been addicted ever sense! I made these two cards using the new Color Burst for Brutus Monroe !

For this card I used a background stamp and applied the color burst on top of it after I embossed it.I stamped the bow pieces and sentiment. I adhered it all the a glitter card base and topped it off with a few bottle cap sequins.
 The next card I used a stencil to lay the Color Burst on making sure I stuck with colors that would not create a muddy look. I stamped the cute fist and used my Scan and Cut to cut them out. I stamped the sentiment on a circle I had die cut out. I adhered a few acrylic bubbles to finish it off.
This last background I created with this particular image in mind. I used a piece of watercolor paper to lay the Color Burst out on. I wanted the background to resemble a jungle so I used Cabbage and Zest. I sprinkled the color and misted it. At first it was to bright (yes, believe it or not it was brighter than this!), so I immediately dabbed it with a paper towel which picked up the excess color. I slowly sprayed droplets over it and was happy with it. 

Here is a video showcasing different techniques and basic color theory to keep in mind when using Color Burst: 
If you are interested in any of the products I used you can find them all here: Brutus Monroe Shop

Sunday, November 5, 2017

Elegant Cameo Card

As a child I had a similar image done of me at Disneyland. Every time I see these it makes me think of Disneyland. For this card I wanted to keep it clean and simple. My original thought was a black and white card, but when I paired the mint with it, it was the perfect mix. Just a simple "hello" sentiment is all that is needed to finish it off. When stamping images like this it is best to ink the stamp up at least twice to get a nice clear crisp image.

I am on the Brutus Monroe Blog with this card. Head over for even more inspiration.

Until next time ~ Happy Crafting!

Friday, November 3, 2017

Turkey Inspired Center Piece!

I am over on the Rinea Blog today with a fabulous Thanksgiving centerpiece!
There is a step by step tutorial on how to make one for your table. If you want to be able to view it from both sides simply make two and adhere in the middle.

I wanted something that reflected a turkey, but was not a turkey. I choose my favorite part -- the tail and finished it off with a big beautiful rose.

Make sure you check it out over at Rinea!

Until next time ~ Happy Crafting!

Thursday, November 2, 2017

Back To School Layouts

I have kept a school album for each of my children from preschool through high school. Well, they still are in school, but it will go through high school. When they were little it was so much fun and easy to find cute back to school paper crafting goodies. As they have gotten older it has become challenging to find anything back to school that is mature like them, yet reflective of who they are and what they are becoming. So, I have ventured outside of the typical back to school supplies and used other things for the layouts.
Parker is going into the 6th grade. He needed something cool, but still kid friendly. I opted for stars in different textures in which I die cut out in various shapes and used as a border. I added a few bottle cap sequins from Brutus Monroe to finish it off. 

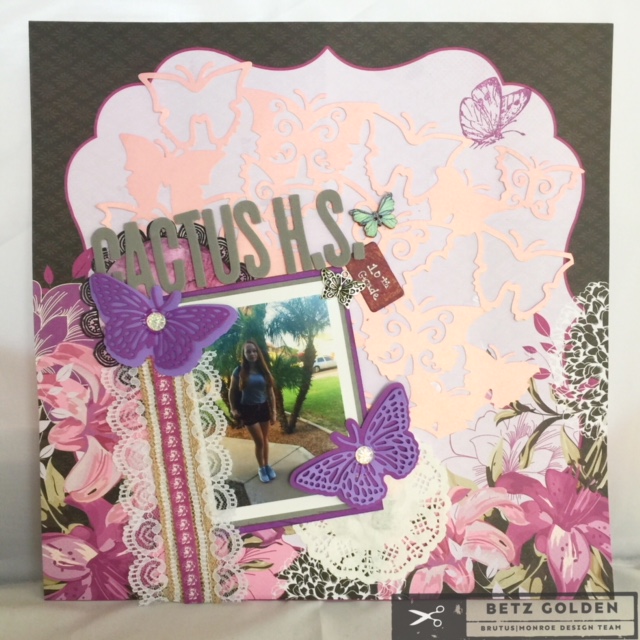
 Annie is entering 10th grade. I decided to use an inspirational kit from Brutus Monroe because she is changing from an impressionable child to a confidant young adult. It reminds me of a transformation that a butterfly undergoes. I love the layering butterfly die!
Logan is entering 11th grade! I decided to use a library back ground stamp and a traditional school style stamp set by Brutus Monroe to create his page. I added a small basketball because that is his life! 

This is the first year I did not use the same sketch and product line for each kiddo. They each turned out great and I hope the kids will cherish them when they receive their albums. 

Until next time ~ Happy Crafting!

Sunday, October 29, 2017

Halloween Card

For this card I stamped the NEW background stamp -- Baroque on gold card stock with Raven Detail Ink. I was torn. I did not know if I was going to make it into a Halloween, Thanksgiving or Christmas card. It can work for all three! Since Halloween is this Tuesday I decided to go with that! The little cameo is a 3-D sticker from the Martha Stewart Halloween line (that is why it is hard to see!).It cam together relatively quick! Once I had the background stamped and trimmed down I ran three pieces of washi tape along the bottom and embellished it with gems and a sparkly spider. 
I am over on the Brutus Monroe Blog today with this card. There are also seven new stamp sets in the shop (this being one of them), so make sure you check them out!

Until next time ~ Happy Crafting!

Sunday, October 22, 2017

Charming Pillow Box


I am over on the Brutus Monroe Blog today with this little pillow box that I made with the November Stamp of the Month Set and Shrinky Dink. My friend, Nadine, said that Shrinky Dink can be shrunk with just a heat gun. It totally worked! Just make sure that you poke any holes before you shrink it down and remember that it will shrink your holes too! You can find more info on how to make this box on Brutus Monroe so head on over there :-)

Until next time ~ Happy Crafting!

Friday, October 20, 2017

Hocus Pocus!

Have you ever had something stuck in your head that you just can't get it out? That is what happened with this card! I saw this quote somewhere and thought it was hilarious. I just could not forget it, so I made a card.

I used a digital download from Calico Collage as the base. I then stamped out the sentiment with the handwritten click it alphabet by Brutus Monroe with the exception of the word coffee. I cut each word out individually. I stamped "coffee" with the Coffee Lover stamp set from Joy Clair and fussy cut it out. I layered the sentiment first and built the rest of the card around it. I stamped the witch on olive paper, cut her out and and put her on last. She can be found along with the "witch please" sentiment on the same stamp set at the Brutus Monroe Shop. I used the coffee cup from the "Coffee Lovers" on yellow card stock, cut it out and adhered it. I placed a pop dot in the witch and placed her on the card. I ended with embellishments I had found at Hobby Lobby.

Come back tomorrow for another fun card!

Until next time ~ Happy Crafting! 

Thursday, October 19, 2017

Drama Llama Card

With holidays upon us it can create some drama -- especially with family! I created this tag in its honor. I adore this Llama set and had to make another card!
Here is a quick one minute video on how to stamp on Rinea Foiled Paper with the Ghost Ink:


Please go check it out Rinea and Pink and Main for inspiration and products!

Until next time ~ Happy Crafting!


Wednesday, October 18, 2017

Old School Origami Bat with a Twist!

My husband is my guest designer today on the Rinea Blog ! He is a geometry guy and used to be quite the paper folding master in his youth. He created this bat with Rinea Foiled paper on their blog today. Please go and check it out! 

Until next time ~ Happy Crafting!

Tuesday, October 17, 2017

Traditional Fall Card

 I discovered layering stamps through Hero Arts at the Mixed Media Convention in Utah this past summer and fell in love with them. I  appreciate that I can create beautiful images with little time because the stamps do all the work for me. I then learned in September that Hero Arts has an extensive monthly subscription option and I signed up!

I made this card using everything from the September box. I have to confess, I'm not a sunflower fan and I don't really care for this type of style. It reminds me of the first time I saw stamps for card making in 1999 through Stampin' Up. Hero Arts seemed to be a modern in style and that is why I opted for the sub. Though the kit is beautiful and perfectly coordinated it just is not my taste.

With all of that being said I did create a few cards with it and was pleased with the outcome. I have a few people who don't celebrate Halloween, yet love Fall. I did not have much in my stash that could cater to their taste and belief, so I do appreciate this set for giving me something to create that is traditional. I really like that each image came with a matching die too! This card took me about 15 minutes to make.
I am excited about the October kit! It is a really fun Christmas theme that has tons of options. I also ordered the penguin bundle which is the set I played with at the convention. Penguins are my favorite animal and the set they created is top notch. I can't wait to play with it and share!

Until next time ~ Happy Crafting!

Monday, October 16, 2017

Foolish Mortals

 I saved the best for last, or should I say -- my favorite. I am obsessed with the sass of the sentiment paired with the innocent character. I mean talk about an oxymoron -- innocent devil. I can't help but giggle when I look at it. I used those gorgeous vintage corner pieces as a way to point to the character alternating the beautiful gems between the pieces. The pattern paper is from the same sheet. The web is flocked and gives the card great texture! Every thing was found in the Brutus Monroe Halloween Inspiration box.
I have thoroughly enjoyed playing with this box! I found it to be a great value. The products are fun, edgy, and cutting edge and there is always a little bit of sass. I love the sass! It is not enough to be offensive, but enough to show personality. Please head over to Brutus Monroe through the link I provide and check it out.

I am sad to say that this box is sold out, however Brutus Monroe is now offering monthly subscription boxes so you never have to miss out again! Check them out at the Brutus Monroe Website

Until next time ~ Happy Crafting!