Showing posts with label distress ink. Show all posts

Tuesday, July 31, 2018

Exploding Birthday Box

My daughter turned 16 over the summer and I knew that not just any card would do. She has a fantastic sarcastic personality and not a fan of bright colors. I had a fun exploding Box Die Set from Pink and Main that I wanted to use. I made the first one in a traditional fashion:
It turned out great and I had a blast making it, but it ended up better suited for one of her best friends. So, I ordered Fired Up! stamp set because she likes dragons!  I also picked up the Celebration Pack from Pink and Main and die cut out each piece twice.
 I adhered the edges:
 And added the panels:
 Making sure I kept the back one up and not folded down.
 I added the sentiment and a few gloss dots from Pink and Main to what would be the front of the box.
 Next I lined up the inside pieces so they touched each other to create even spacing.
 I got my poppers ready!
 And adhered them to the inside of the box.
 This was the final box!
 But it was to young for her. It was cute, but not perfect for her. So I thought outside of the box and created this:
Here is a great video I did on the entire process:


Here is where you can find all the Tim Holtz products used in the video.

It looks like three is the lucky number! It took that many attemps to get the perfect Birthday Box for her.

Until next time ~ Happy Crafting!

Thursday, July 26, 2018

Hipster Birthday Cards

Have you ever been looking through your stash and discovered an awesome set of stamps that you did not even know you had? That recently happened to me. I stumbled upon my Tim Holtz Hipster stamp set and I was inspired to make a set of sarcastic cards!
 I colored the images in with Distress Markers and cut them out with my Scan N Cut. I set those aside and started on the base of my card. I used Distress Oxides  to create the backdrop. For the banner, I used Distressed ink on Stamping Paper and Watercolor Paper. I randomly stamped the Birthday Stamp Set and created two banner pieces using the Thin Fish Tail Banner Die Set . I inked all the edges and assembled the cards making sure to set each Hipster on pop dots for some added dimension. I finished off the card with Tonic Nuvo Drops . Here is a close up of each card:


Until next time ~ Happy Crafting!

Friday, September 22, 2017

Halloween Cards!

I had a little fun in my craft room. Okay...I had a lot of fun in my craft room creating some Halloween cards!
 For this one I used Distress Ink to create the background and splattered it with black ink. The witch is from Brutus Monroe as well as the circle die and markers I used to shade her face in. The sayings in this stamp set are to die for!
 For this card I stamped the image and cut it out along with the sentiments. I added pop dots and adhered it to a sheet of waxed paper. I finished it off with some black sequin. Once again, you can find the stamp set and paper at Brutus Monroe
This card I really had fun with! I wanted it to resemble a bloody spooky night. I die cut the circles, stamped them and embossed not only the sentiments, but the edges as well. I used Dylusions ink spray in Cherry pie on the sentiment. I colored in the scarecrow and background with markers. Before I adhered it to the card base I splattered it with white ink. I added a few scarlet bottle-cap sequins to finish it off. Supplies can be found Here .

Until next time ~ Happy Crafting!

Thursday, August 17, 2017

When You Have Nothing Left to Give....Give Anyway

The last ten years I have been sick. I did not even know that I was sick because I was so used to not feeling good that I thought it was normal. In the summer of 2016 my general practitioner finally convinced me it was time to see a Hematologist. My blood work had come back for years with a high white blood cell count, but this time it had to be dealt with because it was far to high. It took about a year of medical testings and procedures to get answers and we still are not to the bottom of it. In that year I became hopeless and sad. I had to close down my kennel in which I bred Golden Retrievers and was unable to serve. I was doing everything to hold myself together and get better -- after all I am a mom to three kids. While going for treatments and testings I met a lot of really sick people and it was through this experience and journey that I decided to donate my hair -- the one physical feature that I treasured most.

It has taken me three months to document this journey, but it is a journey that is important to me. I want to share my layout with you and that journey to bring awareness to the organization I donated through that  provide children with hair loss at no charge to their families. In fact the name of it is "Children With Hair Loss".

Now, before I share with you my journey I have to tell you that there are tears involved. I did cry as I walked through putting the layout together. I almost did not share it because I felt so silly crying over hair, but I know it is more than just my hair I am crying over. Please check out the day that I donated here: Children With Hair Loss and the aftermath as I put the video together here:When You Have Nothing Left....Give

Until next time ~ Happy Crafting!

Thursday, June 8, 2017

Finnabair Steampunk

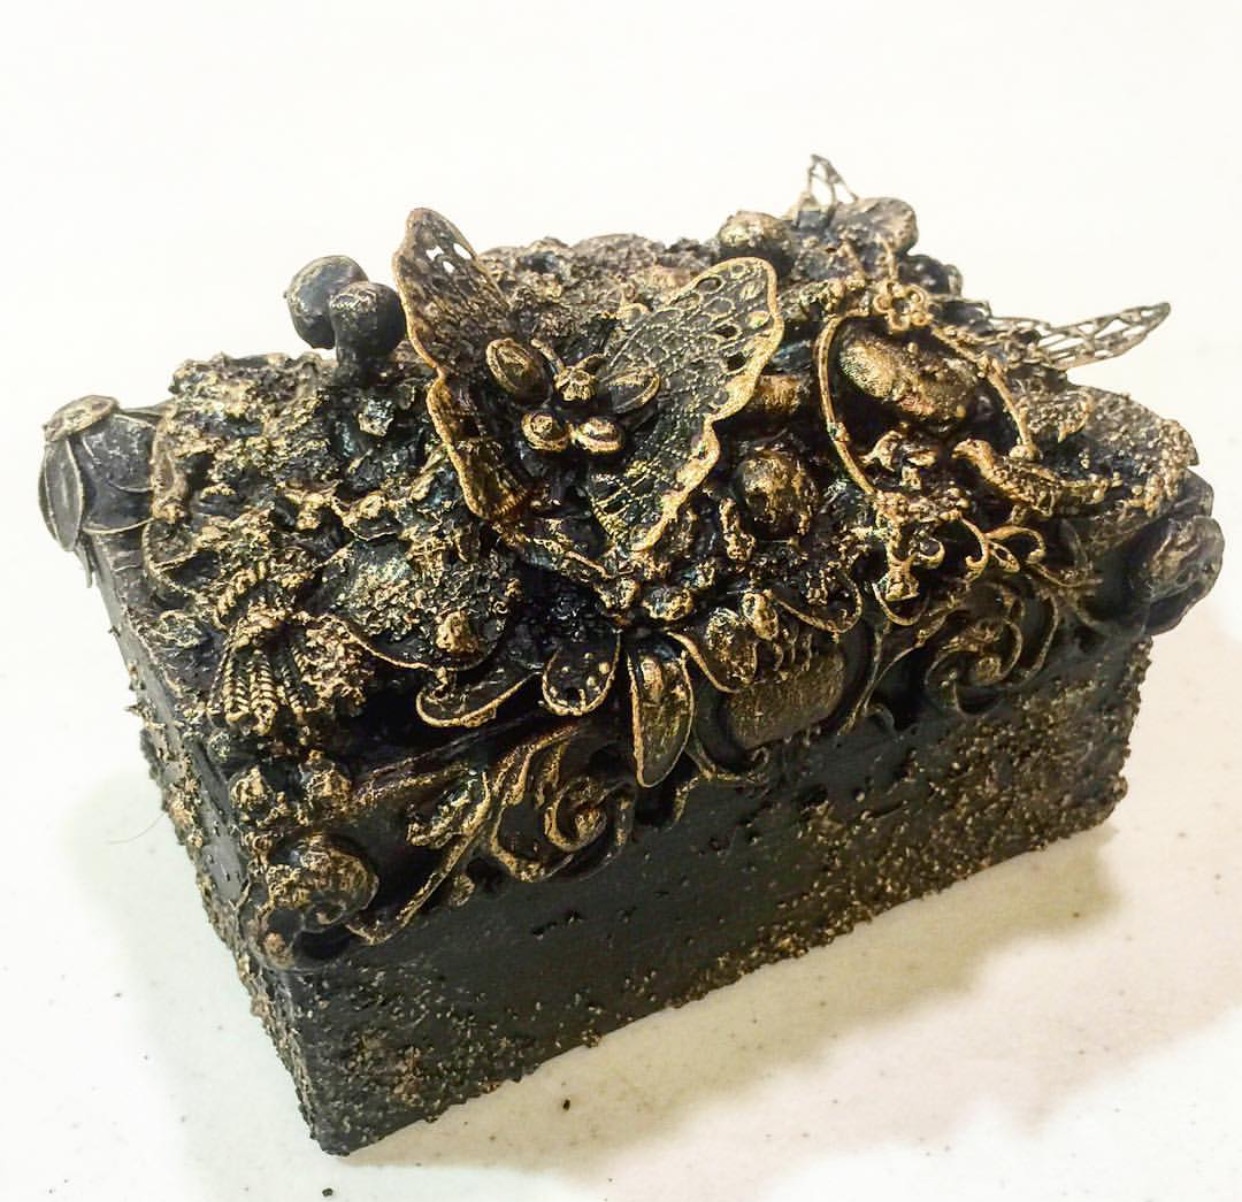
In October of 2016 I attended a mixed media retreat. I learned how to do the Finnabair technique and made this box:
I was addicted to this new form of art that I had never ventured into before. I taught it to my daughter and for Christmas we made boxes like the above for the ladies and for her Grandpa a big letter for his man cave! 

 When I was designing for Beacon I made this canvas:
 I have not gotten much of an opportunity to use this technique until a recent ATC trade in which I had to alter playing cards. One of the themes was steampunk. I created this for the trade:
 When I made the above card I wanted it to be an "Alice in Wonderland" theme. So, I used three digital downloads from Calico Collage . I was so happy with the outcome that I sent the owner a picture of it. She liked it so much and asked if I had done a video tutorial on it. Sadly I had not, but I decided to go ahead and do one. This is the card I created in the tutorial:
There are a few things to keep in mind when doing this technique. First, use your leftovers! Don't go out and buy things for it because you will go broke. This is a great way to use up your stash. The cool thing is you don't have to just use medal. You can use anything. I mean ANYTHING. It all gets gessoed black so it does not even matter. Second, it takes some time because there are multiple steps that require drying. Third, use a light touch and dry brush technique to apply the metallic color. If you want to check out the video on how to do this please go HERE.

Until next time ~ Happy Crafting!
Betz

Tuesday, April 18, 2017

Summer Paradise Card

Hi Friends! I am just having way to much fun with the Summer Paradise kit from Calico Collage . I just adore the pin ups and had to make a card with the scraps.
I did it off the cuff and it was FAST! Check it out here: Summer Paradise Card and make sure you subscribe to my channel and blog if you have not already done so :-) I have a lot of fun things coming up!

Until next time ~ Happy Crafting!

Betz

Wednesday, April 12, 2017

Summer Paradise Planner

Hi Friends! I am super excited about the new and one of a kind planner kits that you can digitally download! I talked at great lengths with the owner of Calico Collage about what us planner gals would find useful. I am proud to present the "Summer Paradise Planner Kit"
This is not like your typical Etsy sticker planner kit. This is entirely different and amazing! I show you here . Please go check it out -- you won't be disappointed! 

Until Next Time ~ Happy Crafting 

Betz

Friday, April 7, 2017

DIY Matching Necklace and Magnet

Hi crafty friends! Betz Golden here!  Today I am sharing with you a sweet necklace and matching magnet I made as a gift for my Mom.


I found these keys with stickers by Tim Holtz in the clearance section at my local craft store and knew they would be perfect for jewelry! 


Since I made this necklace for my Mom I had to use the sticker "Her Majesty" because growing up she would always say she was the queen. First I added the sticker and covered it with the clear dome as provided in the package.


My Mom likes a little bling....well...she likes A LOT of bling and who can blame her? I had some pretty purple gems in my stash and added them to the key. I used Gem-Tac to adhere them.


I like odd numbers -- so 3 it is!


I found some beautiful digital download at www.calicocollage.com that I knew would be perfect for the necklace. I selected the letter "P" because that is the first letter of my Mom's name. I used a circle punch and cut it out.


I adhered the image to the metal circle piece with ZipDry.


I carefully placed it in the center of the circle.


I added the clear dome....

[Pic 9]

And I blinged it out Using Gem-Tac and the same gems I used on the key.


I wanted to make a bottle cap magnet because I had leftovers and my Mom really likes to decorate her refrigerator. So, I took my craft hammer and flattened the edges of a bottle cap a little.


I then repeated the process on the magnet. Once the gems were dry I threaded a cord I had in my stash to make the chain of the necklace. I made a simple knot in the back of it making sure it was large enough to get over one's head. 


This was a super easy and fun project and I highly recommend handmade jewelry for Mother's Day, Easter and birthdays! 

Until next time ~ Happy Crafting!

Betz Golden

Thursday, April 6, 2017

Summer Paradise Travel Journal

It is no secret that I love to travel! Infact, in the summer the kids and I are on the road for the month of July. It is hot here in the valley and I like to get out of the heat and see new places. With that being said, it takes a lot of planning and I need a place to keep information while on the road. I could store it in my phone, but I have had my phone crash or could not get service on the road. I prefer to have a hard copy and I like it to be pretty :-)

Here is a video showing you how I set up my travel journal. I hope it gives you some ideas on how you can create one too and set out on an adventure!

Summer Paradise Travel Journal

Until Next time ~ Happy Crafting!

Betz

Monday, April 3, 2017

Distress Oxide on Dark and Light Paper

Can you determine which is dark and which is light paper?
I must confess, I was having a hard time getting into this new ink -- Distress Oxide. That is, until I tried it in my journals! Now I am hooked on it! I had done a page in my black journal and though I liked it just fine, I had wished it was brighter. I mentioned that to my friend, Linda Israel (she is a designer and does amazing art! Look her up on YouTube!), and she said to try Distress Oxide. So I did!  Check out the video and see which is which as well as a few new techniques on how to use it :-)

Distress Oxide on Dark and Light Paper

Dont forget to subscribe if you have not done so yet :-)

Until Next Time ~ Happy Crafting!

Betz

Sunday, April 2, 2017

Guest Designer For Brutus Monroe!

Hi Friends! I am super exited about April! Do you know why? I am guest designing for the awesome stamp company -- BRUTUS MONROE! If you are not familiar with their products you have got to check them out here! First, head over to their  blog and see how I made this edgy postcardand fun card:


Until Next Time ~ Happy Crafting!

Betz

Tuesday, March 21, 2017

Spotted Pooch ATC Card

I made nine of these Crazy Dog ATC for a stamped image swap! I used Tim Holtz and my very favorite paper -- Rinea !!!! 
I uploaded how to video on how to make this ATC! Check it out here and make sure you subscribe to my channel. I have a lot of great creative things coming to my YouTube and blog you won't want to miss out on.

CRAZY DOG ATC TUTORIAL

Until next time ~ Happy Crafting!

Betz