Showing posts with label Mixed Media Art. Show all posts

Thursday, January 25, 2018

Art From the Heart

Have you ever found something that you love, but want to use it differently than how it is intended to be used? That is what happened when I found this to make heart charms. I really wanted to make a mixed media canvas with the hearts as part of the body and a beautiful clay doll head from Lisa Kettell Designs to create this:
 I also had some medal wings and crown by Tim Holtz as well as angel wings from 7Gypsies that were perfect for this piece. I used the new Prima rust paint system with some modeling clay to create the background and used Nuveo Dew Drops to outline the hearts in the body. I recorded the process as a segment in my "Behind the Art" showcasing how it came together. You can watch it here:  
Until next time ~ Happy Crafting! 

Wednesday, September 20, 2017

Mixed Media Mini Canavas


Instead of giving a card, why not give a small canvas? I created two canvases using Dina Wakely paint, plastic mesh, and Brutus Monroe stamps.
For the Birthday Canvas I first painted the canvas with white gesso and topped it off with Dina Wakely paint and stencils. I added plastic mesh with Sparkle Mod Podge and heat set it so it melted right into the canvas. I layered three strips of washi tape on the bottom, punched four stars out of Rinea Foiled Paper and placed them in the corners. I stamped an image from the Birthday Badges stamp set on a scalloped circle and inked the edges. I placed that in the corner and topped it off with a fun clay candle by Lisa Kettell Design.

I had so much fun creating the Birthday canvas that I decided to create an "Owl Always Love You" with the Owl Love You stamp set and coordinating die.
You can find the stamps and coordinating dies at Brutus Monroe . 

Until next time ~ Happy Crafting!


Friday, September 8, 2017

Mermaid Canvas

The family and I took one last vacation of the summer to Santa Monica California over the Labor Day weekend. One of the things we enjoyed doing the most was collecting sea shells. My very favorite were the little ones that reminded me of butterflies. I knew I wanted to create something with them when I got home so I came up with this:
I have been wanting to create a mermaid canvas for several months and have been collecting my supplies to do so. The Mermaid I found at Calico Collage . It actually is a digital download of paper mermaid dolls! The next thing I found were the pretty little wood laser cut mermaids. Finally, I was browsing Lisa Kettell Designs and found mermaid clay tails that I could paint. 

 I used several different metallic paints on the tails as well as a little glitter glue on the tails. The last thing I had left to find were the shells and I found those on the beaches of Santa Monica.


Here is a video of the process:
Until next time ~ Happy Crafting!

Thursday, July 27, 2017

Mandala Pocket Letter!

Hi friends! Today I wanted to share with you a pocket letter I made for my friend Linda Isreal! My inspiration came from a beautiful clay elephant by Lisa Kettell Designs. I wanted to put something together for her that was pretty and functional. Since she is an artist it was important to me that she received something that she could display or take apart to use in her art.


Please visit HERE to see how it all came together and her beautiful pocket letter to me! 

Until next time ~ Happy Crafting! 

Saturday, July 15, 2017

Funky Bright Sugar Skull Canvas

I have never been into skeletons or skulls until recently. I live in the southwest part of the US. Day of the Dead (November) is a big deal here. Sugar skulls in general can be found pretty much all through out the year and are displayed all the time in cantinas and  Mexican food restaurants (my favorite!). Needless to say, after living here for 20 years I have grown quite fond of them. When Lisa Kettell created beautiful clay sugar skulls I knew I had to have them. I created this canvas with one of them along with digital art from my favorite shop, Calico Collage . This is the first project I made with these gorgeous fun pieces. I have something else planned for the others!


Check out the tutorial I made for you here .

Until next time ~ Happy Crafting!


Thursday, June 8, 2017

Finnabair Steampunk

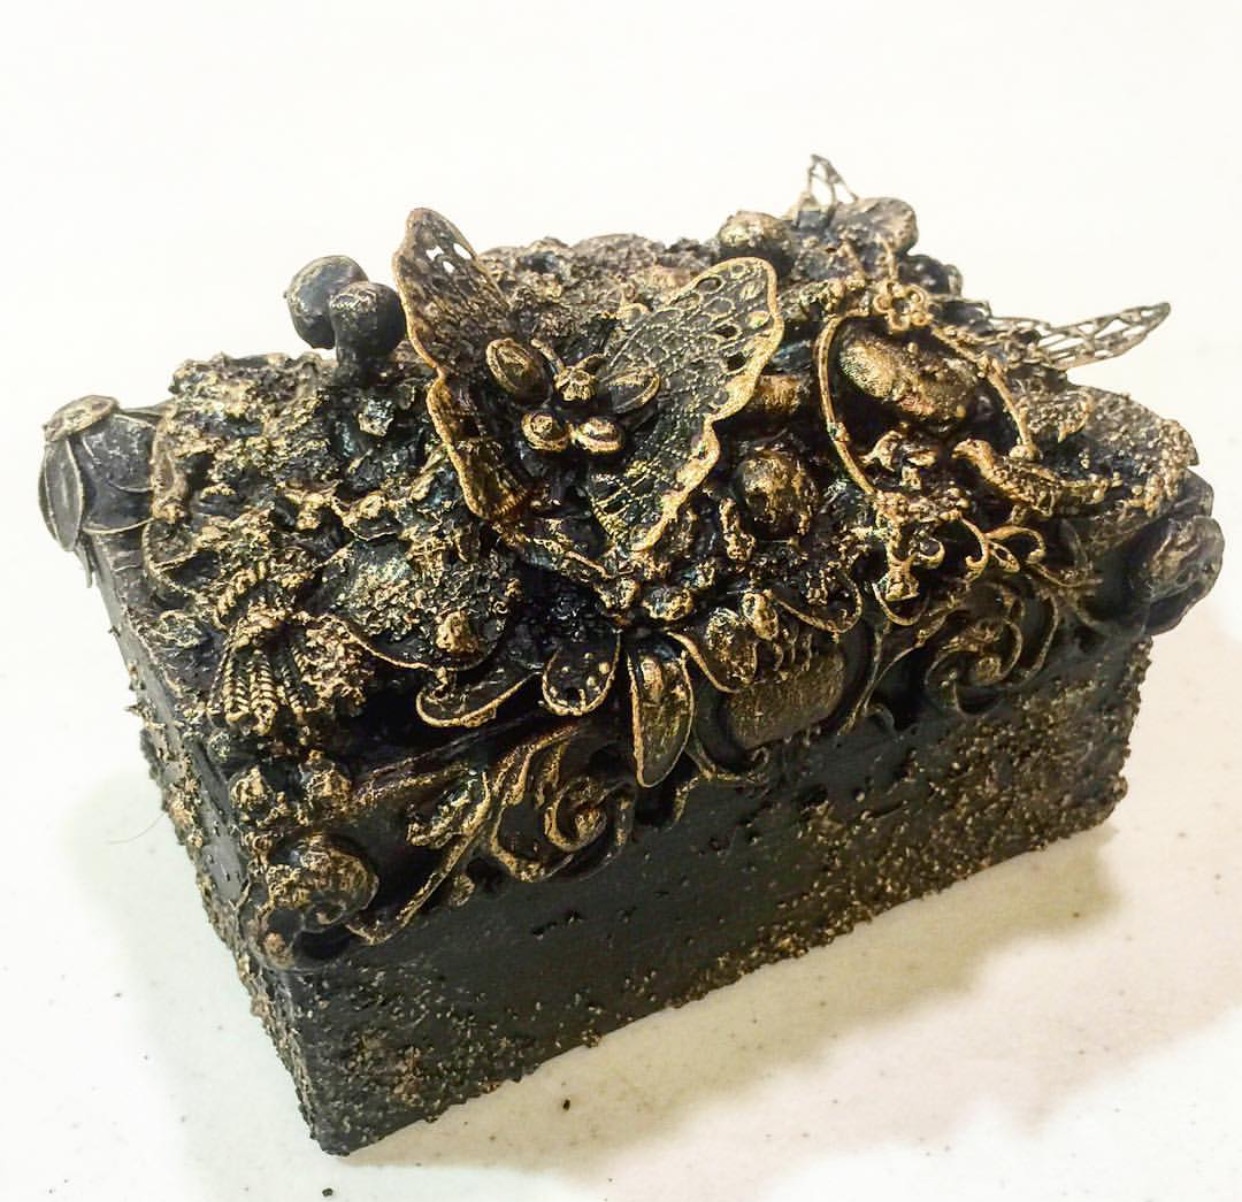
In October of 2016 I attended a mixed media retreat. I learned how to do the Finnabair technique and made this box:
I was addicted to this new form of art that I had never ventured into before. I taught it to my daughter and for Christmas we made boxes like the above for the ladies and for her Grandpa a big letter for his man cave! 

 When I was designing for Beacon I made this canvas:
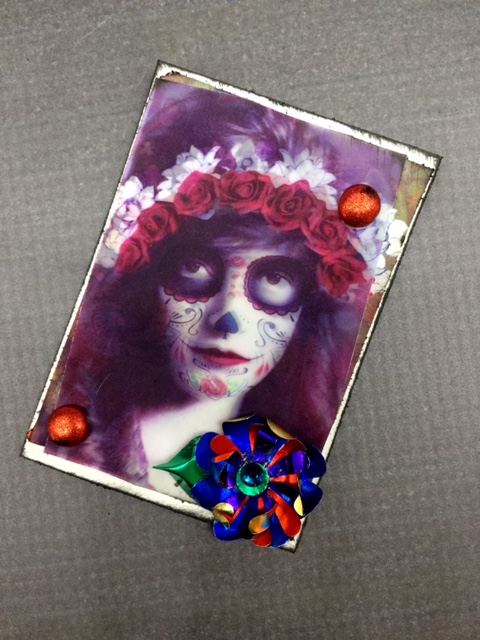
 I have not gotten much of an opportunity to use this technique until a recent ATC trade in which I had to alter playing cards. One of the themes was steampunk. I created this for the trade:
 When I made the above card I wanted it to be an "Alice in Wonderland" theme. So, I used three digital downloads from Calico Collage . I was so happy with the outcome that I sent the owner a picture of it. She liked it so much and asked if I had done a video tutorial on it. Sadly I had not, but I decided to go ahead and do one. This is the card I created in the tutorial:
There are a few things to keep in mind when doing this technique. First, use your leftovers! Don't go out and buy things for it because you will go broke. This is a great way to use up your stash. The cool thing is you don't have to just use medal. You can use anything. I mean ANYTHING. It all gets gessoed black so it does not even matter. Second, it takes some time because there are multiple steps that require drying. Third, use a light touch and dry brush technique to apply the metallic color. If you want to check out the video on how to do this please go HERE.

Until next time ~ Happy Crafting!
Betz

Thursday, May 18, 2017

Mod Podge Blog Hop

This might be my favorite project this year:
 I wanted to create a fun serving tray that I could carry two drinks on that would not only serve as something of function, but also a focal piece. I have no intention of serving food on it so I knew I could add some fibers on the inside of the tray to finish it off.
 I started off with dominoes that I found at Walmart, a tray I picked up at Joann's, Beacon 527 adhesive, Cowgirl Digital from Calico Collage , Sparkle Mod Podge (because every Cowgirl can benefit from a little bling, right?), and Dishwasher Mod Podge.
 The first thing I did was adhere the digital download images to dominoes. I did not ink the edges, because those would not be seen in the tray. I also really liked the white! For this tray I needed 34 dominoes.
 Using Beacon 527 I laid the dominoes like tile on the tray making sure to mix up the pattern to create interest.
 I applied a medium coat of the sparkle Mod Podge first stirring well with my brush. It is important to stir and not shake it. I let this dry overnight.
 Since my intention is to use this as a serving tray with cold beverages I needed to make it waterproof. I will never run it through a dishwasher because it is medal and will rust. Plus, I wanted to use some fun burlap in it. The dishwasher Mod Podge is safe for a dishwasher which means it is waterproof so I finished off the project with it. I layered it on really thick making sure that it filled in the holes between the dominoes. I let this sit for 28 days.It takes that long to properly make sure it is cured. I then finished it off by adding burlap to the edges with the Beacon 527.
I am very happy with how it turned out! Not only can I serve drinks on it, I can also prop it up to display when not in use. 

Make sure to check out how other crafters used Mod Podge in their art!

Until Next time -- Happy Crafting!

Betz

Tuesday, May 16, 2017

Fairy DIY Gift

I made a necklace, matching card and gift bag for a Fairy Fan. I thought I would share how I did it. This was a super easy thing to make using a digital download. I found mine at Calico Collage ! She has the best art I have ever seen and a huge selection. It was hard to pick which one I wanted to feature.

To see how I put it together I made a video tutorial for you. You can find it here

Please subscribe to my blog and channel if you have not already done so. I have a lot of fun stuff coming out soon.

Until next time ~ Happy Crafting!

Betz

Friday, May 12, 2017

Tin Roof! Rusted!

Love Shake! Baby Love Shack! 

Sorry....I have had that song in my head forever and a day! Why? Well, because I have been wanting to put a metal looking roof (tin) on this bird house!

 It started off like this -- sad...ugly and plain. It really should be a spooky haunted house, but by the time I had figured that out it was to late. I already had spent a day putting it together. Instead of pitching it I decided to just hide it from myself until I could look at it again without getting mad. Have you ever been there? Gotten frustrated with yourself because you put so much time into a project and have it just turn out bad? I was there with this!
 I then started thinking about my little sad house and thought a roof that looked like gold would be cute on it and maybe save it from the dumpster. I pulled out my Rinea foiled paper and got to work! First thing I did was fold it over like so....
 Next, I punched a bunch of circles....
 I started on the botttom of the roof and applied a row of circles.
 Instead of keeping the roof all gold I thought it would add some personality to rotate in silver -- and that's just what I did :-)
 I repeated the process until the roof was covered.
 I hid the top crease with a line of Rinea circles.
 I folded and flipped up the edges to help the roof stand out.
I then went back through and did the same to the side pieces and porch. I punched some butterflies and leaves and sprinkled them on the house and called it done!
I really like the look of the roof! I think this will be my stand by on altering them in the future.

Until next time ~ Happy Crafting!

Betz

Wednesday, May 10, 2017

Sugar Skull Card

 I have a confession to make....though I am on who likes to push the limits in my art and I love edgy things, I have always steered clear of skulls. It is not like they offend me. I just struggle with the concept of them and making them pretty. However, living in the Southwest and participating in Day of the Dead and Cinco De Mayo I have grown to admire Sugar Skulls. I thought it was time that I used them in my art.
 I wanted to create something colorful, whimsical and pretty so I stuck with bright bold embellishments that I made with Rinea Foiled Paper
I found these Sugar Skull paper dolls to be gorgous and I had to use them from Calico Collage .

I upload a step by step how to on making this card here . Please go check it out and don't forget to subscribe if you have not already done so!

Until next time ~ Happy Crafting!

Betz

Tuesday, May 2, 2017

Sugar Skull ATC

Cinco De Mayo is right around the corner! Every time I think about it or Day of the Dead which is November 2 I associate sugar skulls with them. I decided I wanted to make a spooky yet beautiful sugar skull ATC card. I download an ATC digital print sheet from Calico Collage and pulled out my Rinea Foiled Paper to make a shiny bright flower. I used vellum to give it a spooky appearance over the original digital art. I then used a permanent rubber cement technique to adhere the rest.

I uploaded a nice tutorial on the process here. Feel free to check it out!

Until next time ~ Happy Crafting!

Betz

Sunday, April 30, 2017

Enchanted Rose Coaster

I am going through this phase right now that includes dominoes, Brutus Monroe Surface Inks and background stamps. No Joke! It is hard to find a universal ink that does everything and can be used on anything. Add to that a big beautiful image and being able to use it all on an everyday item...or at least something that most homes have in a new way makes me a happy crafter! I created this:

It's a coaster. A totally usable functional beautiful coaster. I' m over on the Brutus Monroe Blog today in which I show you how to create this step by step. Check it out here: Brutus Monroe. I am even enabling because you can visit the store and pick up the stamp and inks. Sorry....not really....but don't say I didn't warn you ;-) For realz though! Head over and check it out! This is one of the coolest things I have come up with in my wee little brain in a long time.

Until Next Time ~ Happy Crafting!

Thursday, April 27, 2017

Get Your Kicks on Route 66!

I like to take the kids on a trip over spring break. This year we could not be gone long so we decided on the Petrified Forrest. It ended up being one of the best trips EVER!
 The first stop on our trip was to see the Man Standing on the Corner in Winslow AZ


 Reaally the only good place to stop for lunch on the way to the Petrified Forrest was in Winslow and we stumbled upon this place which ended up being the highlight of the trip for me!
 I adored all the medal animals!
 Inside this hotel was an AMAZING art gallery that was open to the public. Though the pieces are political in nature I was mesmerized and could appreciated the beauty in it.


 Once we reached the Petrified Forrest we checked into our hotel. We decided on the Wigwam motel. Not only is it a historical mark, the Cozy Cone motel in the movie "Cars" is based off this place AND the historical cars that line the wigwams. These cars were not added after the movie. Disney based the characters off of these cars that have been here for decades. I also happen to be a sucker for old cars. In fact, my dream car is a 1956 baby blue white topped Chevy. I was in heaven!


 This was our Wigwam we stayed in. It was so much fun! The inside had two queen beds, a bathroom and a television. It was quite comfortable and the shower was pretty good!
 The next day we headed to the Petrified Forrest and we ran across the old Route 66 that was never paved.
 If you are ever on I40 and see these small wooden poles you are looking at the old Route 66!
 The first stop in the Park was the amazing Painted Desert.

 Finally we saw what we came for -- the Petrified Forrest!


 The trip, though short, was so much fun! I created an album to document it all in. One or two pages in my family scrapbook just was not going to be enough room.
You can see the album and get more of the story here

The journaling kit I used is actually a digital download from Calico Collage  and check out Brutus Monroe for the awesome peg stamp alphabet and ink.

Until next time ~ Happy Crafting