Thursday, March 10, 2016

Cactus Card

Living in the dessert and not a huge fan of cactus it can be a challenge to make a card with them -- until I found this cute stamp and die set from CTMH! I paired it with an unlikely pattern paper to keep it whimsical and fun. I kind of wanted it to express "spring in the southwest". I think I achieved that well!
 
I made this card for my Mom. It is 5 x 7 and has a pocket on the front for some pictures. I stamped the sentiment on the envelope holding the pictures.
 I used pop dots to attach elements of the card to give it some depth and personality.
 It still is cute once the envelope is taken out of the pocket too! My mom displays cards that are given to her so it was important that it looked complete no matter what. Though if I know her she will take the pictures out and just put the envelope that was housing them back in the pocket.
 I also made a set up of Cactus cards for my shop. These are on a smaller scale and universal:

If you are interested in this set or curious to see what other things I have available please follow the link to my store: Naughty and Nice Artist .
 
 
Until next time -- Happy Scrappy! 

Tuesday, March 1, 2016

Shabby Chic Wall Hanging

One of the items in the Feb. Flying Unicorn Kit was a nice sized chipboard piece. I decided to download a cute digital piece as the focal point for the piece. My daughter and my birthdays are coming up in June. I like to decorate our Breakfast Nook up for big occasions. I think that two birthdays in the same month call for a Cupcake Shabby Chic type themed Nook. Granted there are no cupcakes on this piece, it will fit nicely into the décor.


Until next time -- Happy Scrappy!

Friday, February 26, 2016

Masculine Birthday Layout

One of the most challenging events for me to scrapbook is a boy's birthday. There are so many pretty and super cute birthday embellishments on the market that are great for a girly girl, but not much for a boy. I was super excited to find the Tim Holtz birthday stamps! These are amazing! I used them to document my boys' birthday party along with the Feb Flying Unicorn kit. The brick paper is by far my favorite piece in the kit! I used the star chipboard boarder as an embellishment to the page. It really is a simple layout, but makes a great statement.
 My boys are four years apart and their birthdays fall a week from each other. So, we have come up with Brother's Day in which we have a family party for them. They each get to pick their cupcake and open their presents. Although we do not give them our presents until their actual day in which they go our to lunch with their Dad and pick what they want for dinner that night. This year Logan picked Raspberry Coconut  Cream Vanilla Cupcakes and Parker picked Chocolate Butterfinger Cupcakes.
After over 20 years of scrapbooking I have come to terms that it is time to change and move on. I just don't enjoy the process as much as I used to and it seems more like a chore than a pleasure. However, I still want to document pictures and memories so I am transferring over to the "Happy Planner" system. This has not been an easy choice to make and I have not entered into it lightly by any means. I have thought about it for months. I will periodically do a traditional scrapbook for special events or a trip. I am going to continue with traditional scrapbooking until July -- when I make the switch to my Happy Planner. In fact, I desperately want to be caught up by that point so will be hitting it hard. Once I make the switch I will share with you my Happy Planner and how I use it. I also have gotten into card making, art journaling, DIY home décor (I love to change out my breakfast nook seasonaly!) , and mixed media. My blog will reflect those types of things. This has been an amazing journey in which I have grown creatively and have made terrific friends. I hope to evolve and expand from where I am at today!
 
Until next time -- Happy Scrappy!  

Thursday, February 11, 2016

Valentine's Day Card

It is that time of year. Love is in the air and we are bombarded with pink, red and hearts. I am okay with that. I love pink and red and even hearts :-P! This year I decided to use one of my new favorite things to make my Valentine's Day card -- Prima dolls!
 
 
I found the sweet little dollie heart at the Target $1 spot. They came in a pack of like 12 or 25. I can't remember. I can't even find the rest of my pack to check! The doll I used is Valentine Girl. Isn't she sweet? I used Copic markers to color her in. I tried to make this card flat so I could easily mail them without having to pay extra postage or a larger envelope. I used a sketch because I was making 10 of them and wanted to keep them similar. I later realized that I get bored after 3 and next time I need to mix it up! 
 Now, this next thing I made was super duper fun! I signed up for a card and candy bar Valentine's Day Swap. The card had to be a 5 by 7 and I had to include a candy bar. My partner likes Payday bars. I was not sure if I was suppose to make a card and just throw a candy bar in with it or deck the candy bar out too. I chose the latter option because what fun is just a candy bar right?

I used another sweet little doll from Prima and I stamped the ticket from the Valentine Girl set to add to the card as well. I then paper pieced her together. I added a pretty pearl necklace (after all she is a lady and every lady needs a pearl necklace!) and have her carrying behind her back a heart lollipop. I had the illusion of balloons running around in my brain and I like how it turned out.
 For the candy bar, I created a wrapper with the same paper I made the card out of. I stamped  the dog and dressed him up in hearts (Or her....but I like male dogs better so to me that is a boy!). I then wrapped the bar and used some ribbon from my stash and added the dog to top it off.
 This is the final product! I love love love it and I hope my partner does as well! It was super fun and super sweet! :-)
Until Next time -- Happy Scrappy!

Monday, February 8, 2016

Christmas 2015

Do you know what makes me happy? When I can complete a holiday set of layouts and actually like them! For some reason I struggle with theme layouts. I purchased Lemoncraft Christmas paper for a Christmas card swap I was in and had lots of leftovers. They just happen to match my pictures perfectly so I scrapped our Christmas using it. I also found some nice Teresa Collins paper trim and die cut flowers that ended up matching nicely with the paper. I do not like "matchy matchy" scrapbook pages. To me it reminds me of those Avon jewelry sets! Not my thing at all. 
 It never fails that I end up with a hodge podge of pictures that have to be scrapbooked, but really don't go together other than they were taken on the same day. I refuse to ever dedicate more than one page in my scrapbook for those and usually end up not liking the layout I do for them. Well, not this time! I really like this page! I think it is super cute and pulls them all together :-)
 This actually was the set of pictures that I started out with to scrapbook. It is our Christmas Eve tradition and I like each of these photos because they showcase the evening perfectly. I found a fun sketch on pintrest that I used to complete the layout. Once again, the die cut flowers came in handy! I simply inked the edges, crumpled them up and put them on a brad. So simple, yet so pretty.
 And this...this right here is by far my very favorite set of pictures from Christmas. My son finally got from his grandparents the latest and greatest DS. They tricked him and put it in a pop corn bin with the bagged pop corn on top of it. He opened the bin and was like "Oh cool! Popcorn! Thank you very much." and he started watching other people open presents. Grandma told him he better take a second look and this is what happened:
PRICELESS! It is times in which you capture a moment so perfectly that make all the time you spend on saving, scrapping and documenting worth it.

Until next time -- Happy Scrappy!

Thursday, February 4, 2016

Holiday 2016 Visit with my Mom

I cannot even express how super excited I was to play with this paper from Lemoncraft and the new glitter paste from Prima! Well, new to me at least ;-) I used the paste on the scalloped circle frames of each layout. I found the sweet little pinecones on the clearance rack at Hobby Lobby 90% off. I bought 6 different types for under $2.50 and I have lots left over! 
 I added some glitter paste to the flower for more texture and the illusion of snow. You know here in the Phoenix area we get a lot of snow right? ;-) Haha!
 I was super happy that I was able to slam four pictures on this layout! It was simply luck because of how the pictures were taken. Otherwise, there was no way I could have been successful at it.


Until next time --Happy Scrappy!

Friday, January 29, 2016

Fashionably Fabulous Friday!

As a stay at home mom I completely understand how easy and convenient yoga pants and sweatshirts can be for everyday wear. I also know that how productive I am during my day and how I feel about myself is influenced by what I wear. Therefore each week, on Sunday, I take a look at my planner and pull my wardrobe together. I get a lot of questions on how I always look so put together even just running to the store. I am going to answer those questions in this post as well as share what last week's wardrobe was and how easy it really is to dress for your day.
 
 
Once I determine what my week involves I pick a common thread to develop my wardrobe around. It can be a color, a purse, a pair of shoes, a piece of jewelry or even a lipstick. I had just purchased a Kate Spade purse in my favorite color -- navy! I decided to base my wardrobe on the purse so I could carry it all week. I have to have my bag match my outfit and I really like purses. If you can get away with a seasonal neutral purse and only swap out when the weather changes I am so jealous of you! I just love different shape, sizes, and color purses. I do not like to switch them out more than once a week, so usually my wardrobe is based on my purse. As you can see, I really like navy! 
 Once I determine the common theme I pull outfits together on sequin hangers including the jewelry I plan to wear each day. I like these types of hangers because they are wood and can withstand abuse and the sequin hold the clothes on nicely. Nothing slips off. Plus, they are gorgeous and I like seeing them greet me every morning when I go into my closet.
 It takes me about an hour to get the wardrobe put together, but it saves me at least triple that time during the week and those precious morning minutes that we seem to never have enough of. Here is my week of navy:

Monday was my errand day. I had to run to the post office and grocery shop. Though I love a good dress and flats, today was not the day to do that. Comfortable walking shoes and jeans were the best fit.
 Tuesday: I had an appointment and a good excuse to pull out a maxi dress along with my flats.
 Wednesday: My day of cleaning and bring meals to my son's basketball team as well as the game! I opted for a dressier top that was washable and a shrug because it was chilly.
 Thursday: I had another appointment and a few errands to run as well as a lunch date with my friend.
 Friday: game day! My son had a basketball game in the afternoon and I had some meal prepping to do in the morning.
 Saturday: Playoff football game. Though it is not navy my purse still worked with it and I had to wear my team's shirt!
 Sunday: Church and scrapbooking. I wore a navy dress, navy shrug with red jewelry.

When coordinating neutrals like navy don't be afraid to step outside of the box. A lot of people will pair navy with red or white. However, it also looks great with green, hot pink, coral, orange and silver. You can also wear gold with it!

Until next time -- Happy Scrappy!

Friday, January 22, 2016

Movies

Living in the southwest of the United States six months out of the year it is unbearably HOT! I personally like to get out of the area and travel during the summer months, but sometimes that just does not happen. One of our favorite things to do when we need to get out of the house is go to the movies. This is something that needs to be documented because it is a big part of our life. I don't watch a lot of television, but if it is in the theater chances are fair that I have seen it. Here is a page I did of my daughter and I recently at the movies:
One new to me thing I have been wanting to try are these Prima doll stamps! I was introduced to them from my friend Erin at that October Retreat I attended. I thought this one would be perfect on this layout. I used coordinating paper to make her dress. This is a pretty simple prima doll tag and it works well with the page:
 Close up of the clustering I did on the page:
 
Until next time -- Happy Scrappy! 

Tuesday, January 19, 2016

Flying Unicorn January 2016 Page!

Somewhere along the way I lost my artsy mojo. It had been missing for over a year. I have been going through the motions of getting pictures on pages to get into albums, but I was not pleased with the result -- until now! The Flying Unicorn for January 2016 really hit it for me. It gave me what I needed to be creative once again. Here are the seven layouts I created with the kit:


 This last one I made with the scraps from the kit. I did not even have a whole sheet of paper and had to make one. Though I love my one and two picture layouts, they are not always practical and I need to showcase an entire event. Sometimes kits are not easy to do that with, but I was able to do that with this one.
Until next time -- Happy Scrappy!

Sunday, January 17, 2016

Shaker Card

In October I went on an amazing retreat in which a fantastic class by my new artsy friend Jennifer taught how to make a shaker card. What I appreciate most about Jennifer and the way she creates her cards and altered items is her use of what most would consider trash and everyday things you have in your home. I used "trash" to make this card!
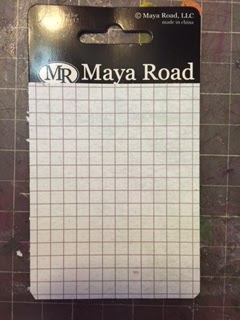
 Maya Road not only has amazing products, they also package them really well! I knew after grabbing a pin this package would hold sequence for a card!
 I emptied out my package and broke it down like so:
 I measured my paper I wanted to use as the background to the shaker portion of the card and attaced it to the cardboard backing:
 I then took a wooden embellishment I wanted in the shaker and attached it like so to the piece that held the pins. It needs to be face up like this so it can be seen on your card:
 I grabbed my sequence and was hopeful I could use a lot up (did not happen -- I still have 3/4 of the bag left).
 I added my sequin over my bird to my liking:
 And put the whole thing back together again:
 I shook it to make sure I would not lose the sequin:
 Cut off the top and tested it again:
 I then added it to my card making sure I secured it with Glossy Accents:
Before you toss the packaging your scrapbooking items come in take a closer look because you may be able to use it in your art or on your page. I may just start buying products for their cool packaging ;-)

Until next time -- Happy Scrappy!