Friday, January 29, 2016

Fashionably Fabulous Friday!

As a stay at home mom I completely understand how easy and convenient yoga pants and sweatshirts can be for everyday wear. I also know that how productive I am during my day and how I feel about myself is influenced by what I wear. Therefore each week, on Sunday, I take a look at my planner and pull my wardrobe together. I get a lot of questions on how I always look so put together even just running to the store. I am going to answer those questions in this post as well as share what last week's wardrobe was and how easy it really is to dress for your day.
 
 
Once I determine what my week involves I pick a common thread to develop my wardrobe around. It can be a color, a purse, a pair of shoes, a piece of jewelry or even a lipstick. I had just purchased a Kate Spade purse in my favorite color -- navy! I decided to base my wardrobe on the purse so I could carry it all week. I have to have my bag match my outfit and I really like purses. If you can get away with a seasonal neutral purse and only swap out when the weather changes I am so jealous of you! I just love different shape, sizes, and color purses. I do not like to switch them out more than once a week, so usually my wardrobe is based on my purse. As you can see, I really like navy! 
 Once I determine the common theme I pull outfits together on sequin hangers including the jewelry I plan to wear each day. I like these types of hangers because they are wood and can withstand abuse and the sequin hold the clothes on nicely. Nothing slips off. Plus, they are gorgeous and I like seeing them greet me every morning when I go into my closet.
 It takes me about an hour to get the wardrobe put together, but it saves me at least triple that time during the week and those precious morning minutes that we seem to never have enough of. Here is my week of navy:

Monday was my errand day. I had to run to the post office and grocery shop. Though I love a good dress and flats, today was not the day to do that. Comfortable walking shoes and jeans were the best fit.
 Tuesday: I had an appointment and a good excuse to pull out a maxi dress along with my flats.
 Wednesday: My day of cleaning and bring meals to my son's basketball team as well as the game! I opted for a dressier top that was washable and a shrug because it was chilly.
 Thursday: I had another appointment and a few errands to run as well as a lunch date with my friend.
 Friday: game day! My son had a basketball game in the afternoon and I had some meal prepping to do in the morning.
 Saturday: Playoff football game. Though it is not navy my purse still worked with it and I had to wear my team's shirt!
 Sunday: Church and scrapbooking. I wore a navy dress, navy shrug with red jewelry.

When coordinating neutrals like navy don't be afraid to step outside of the box. A lot of people will pair navy with red or white. However, it also looks great with green, hot pink, coral, orange and silver. You can also wear gold with it!

Until next time -- Happy Scrappy!

Friday, January 22, 2016

Movies

Living in the southwest of the United States six months out of the year it is unbearably HOT! I personally like to get out of the area and travel during the summer months, but sometimes that just does not happen. One of our favorite things to do when we need to get out of the house is go to the movies. This is something that needs to be documented because it is a big part of our life. I don't watch a lot of television, but if it is in the theater chances are fair that I have seen it. Here is a page I did of my daughter and I recently at the movies:
One new to me thing I have been wanting to try are these Prima doll stamps! I was introduced to them from my friend Erin at that October Retreat I attended. I thought this one would be perfect on this layout. I used coordinating paper to make her dress. This is a pretty simple prima doll tag and it works well with the page:
 Close up of the clustering I did on the page:
 
Until next time -- Happy Scrappy! 

Tuesday, January 19, 2016

Flying Unicorn January 2016 Page!

Somewhere along the way I lost my artsy mojo. It had been missing for over a year. I have been going through the motions of getting pictures on pages to get into albums, but I was not pleased with the result -- until now! The Flying Unicorn for January 2016 really hit it for me. It gave me what I needed to be creative once again. Here are the seven layouts I created with the kit:


 This last one I made with the scraps from the kit. I did not even have a whole sheet of paper and had to make one. Though I love my one and two picture layouts, they are not always practical and I need to showcase an entire event. Sometimes kits are not easy to do that with, but I was able to do that with this one.
Until next time -- Happy Scrappy!
Sunday, January 17, 2016

Shaker Card

In October I went on an amazing retreat in which a fantastic class by my new artsy friend Jennifer taught how to make a shaker card. What I appreciate most about Jennifer and the way she creates her cards and altered items is her use of what most would consider trash and everyday things you have in your home. I used "trash" to make this card!
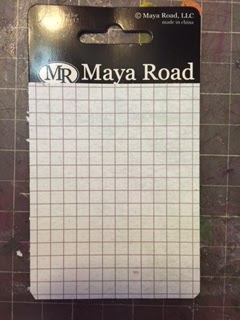
 Maya Road not only has amazing products, they also package them really well! I knew after grabbing a pin this package would hold sequence for a card!
 I emptied out my package and broke it down like so:
 I measured my paper I wanted to use as the background to the shaker portion of the card and attaced it to the cardboard backing:
 I then took a wooden embellishment I wanted in the shaker and attached it like so to the piece that held the pins. It needs to be face up like this so it can be seen on your card:
 I grabbed my sequence and was hopeful I could use a lot up (did not happen -- I still have 3/4 of the bag left).
 I added my sequin over my bird to my liking:
 And put the whole thing back together again:
 I shook it to make sure I would not lose the sequin:
 Cut off the top and tested it again:
 I then added it to my card making sure I secured it with Glossy Accents:
Before you toss the packaging your scrapbooking items come in take a closer look because you may be able to use it in your art or on your page. I may just start buying products for their cool packaging ;-)

Until next time -- Happy Scrappy!

Thursday, January 14, 2016

VS Angel

A few months ago I found this fabulous perfume bottle at Victoria Secret. Sadly I did not love the perfume on me, but had to have the bottle so I bought it. I wore the semi okay perfume almost every day for the last few months just so I could empty and alter it! 
 I found these dingle berries on sale (90% off) and thought they would be perfect for my bottle. I used Glossy Accents as adhesive to hold everything together on the glass. I seriously love this stuff! It leaves a really cool glass type quality to it alone and it holds all those bulky pieces down on whatever surface you are working on.
 When I received the January kit from Flying Unicorn I knew I found the face for her -- I adore the white resin piece! The butterfly metal piece is perfect for the center of the wings. I thought the wings would be the back, but I when I saw the butterfly I decided to flip it. I mean, the wings are my favorite part of the bottle so it makes sense that they should be visable from the front.
I usually do not like to mix metals, but since the bottle is a cool tone along with the frosted wings and my butterfly is gold (warm tone) I decided to use silver metal as the body of the butterfly.
I finished off my angel with a head full of silver dingle berries and small prima flowers from my stash folded in half . I then added a few strands of small pearls I had as well.
I do not consider myself a mixed media expert by any means. I am playing with it more, but I am still learning. I really am pleased with how this turned out.

Until next time -- happy scrappy!

Friday, January 8, 2016

Coaster Set

 My very favorite monthly kit comes from the Flying Unicorn. Check out there store here! Each kit contains an off of the page project. This month it was coasters and I knew just what I was going to do with them! I have a fondness for pin-ups from the WW 2 era. I have a friend who is an amazing seamstress whom also happens to adore pin ups, so I decided to make this coaster set for her. All of the coasters and holder was made with the January kit from Flying Unicorn. I painted it first with black gesso and went to town from there!
 The sentiment on a few of these were actually an after thought. They are clear stickers that are part of the kit. Once I got done with each coaster I ran across the stickers and added them.
 I inked the edges of the coaster with the chalk ink in the kit. This helped hide some of the not so perfect measurements around the edges.
 The lace little tabs were the perfect size for the coasters and matched the décor well.
 I used a matte gel over the coasters in hopes that it would make them waterproof so they could be used to hold drinks on. It caused the coasters to buckle and bubble. I was concerned that they would eventually tear, so I came up with something else. Something that is not from the "art" world to make them truly waterproof and stand the test of time. I am not sure if I came up with something extremely clever or if I am a true redneck :-). I used this on the side with the pin up:
Yep! That is packing tape. I was a little nervous to try it at first, but once I did I really liked how it looked! Not only are the coasters waterproof, if something spills on them they can easily be wiped clean.

Until next time -- Happy scrappy!

Sunday, January 3, 2016

Serendipty

It has been 11 months since I have uploaded anything. I have wanted to come back to blogging for a few months now, but hesitated because I was not sure I had the time to devote to it. The last thing I want to do is hit this hard and then tap out. Part of me thinks that blogging is in the past. It is fading out. With Facebook pages and Instagram accounts that are easily updated on one's phone the thought of actually sitting down at a computer to do a blog entry seems like a lot of work -- especially considering you may not feel as though you have anything new to share with the world. Now that I am back home again and not holding down a job I really have missed my hobby. I also have missed completing challenges online as well as being on a design team (although right now I am far to rusty to even try out. However, with practice I hope to be back in the saddle again). It is for those reasons that I come back to this blog. My home in the cyber world.
 
 
One of my goals this year is to complete an art journal! I am using the prompts provided by "Journal 52"( Click here  to check it out) for the year. I decided to use the prompt "Strange Word". Although, I turned into my favorite word: SERENDIPITY which means finding valuable or pleasant things that are not looked for. This word to me is happy, whimsical and fun! I wanted my page to reflect those characteristics. 
 I knew that the colors had to be brings and happy so I went with orange and yellow on my geli plate along with stencils. Once that dried I took another stencil, laid it directly on my geli plate and applied pink paint with a roller. I lifted the stencil and placed my page on the plate. I used bright pink spray for the edges. I used  a pearlized purple ink that looks silver against the background for my ladies that I placed randomly around. I wanted them to be whimsical too :-).  Black ink was then used for my word. I also used glossy accents over my lettering to make them shine. I messed up on the crowns and decided to draw them and fill them in with silver liquid pearls.

 As a side note, I have come to terms with, at least for me, art is about experimenting with different mediums and techniques then fixing them. Nine times out of 10 my finished projects are a result of something going wrong, but it works for me. It is my serendipity!

I liked how the crowns turned out and decided I wanted a little sparkle on the page. To achieve the sparkle I used a yellow glitter glue on the hair.
 One of the things I had not anticipated was how big the stamp for the lady was -- I do not have a block that large, but the lid to my ink storage case was about the right size so I used it. I have learned not to get discouraged when I don't have the correct block size for my cling stamps. Usually, I can find something in my studio that will get the job done and I do not have to go out and buy anything.
 Another trick that I use is I place my stamps directly where I want them to go on my page before I ink them up or put them on my block. This allows for proper spacing and it also is a certain way to make sure I have the letters and numbers going in the right direction. For the word SERENDIPITY I needed two Es and Is. I had two choices I could lay everything out  estimating how much room I would need for those letters or I could use other stamps in the set as the letters. I opted for the second because the set I used is rather whimsical and fun. Therefore, it would add more whimsy and charm to the page. I flipped the "?" upside down and used it as one of my "I"s.
 I used the number "3" backwards for my "E".
 Once I had all of my letter stamps laid out to my liking, I placed my block on them to pick them up and created my word stamp.
 I inked my stamp well and applied it to my page.
 I grabbed a green color pencil and filled in the letters. I then went over them with glossy accents to make them pop and shine.
 I am thrilled with the results. Although it was not exactly how I planned it to turn out (it never is) it matches my vision of what SERENDIPITY looks like.
I just love saying that word over and over and over again. Serendipity, serendipity, serendipity. Try it! It is fun!

Until next time -- happy scrappy!