Friday, February 13, 2015

Pucker Up :-*

One of the perks of being a woman is we get to dress up and play with make up. I get lots of questions on how to apply red lipstick. Apparently a lot of women out there do not think it is for them and/or down right scared of it. Rest assured, there is nothing to fear and I am going to share with you how I apply it. The key is making sure that you get the right shade for your skin tone. I am almost 40 and my skin tone has changed in the last decade. Mary Kay has always made the perfect red for me. They did discontinue their red lip liner which is probably the dumbest move a make up company could ever make in my opinion. It is not like that is a color you can just substitute with another color liner. So, I have been forced to use another liner since MK no longer sells one. For this tutorial I used a Rimmel Red liner (thank you Roberta for giving it to me!)
 
 My personal preference is to go a bit lighter with my eye make up when I wear red lipstick. However, I do need to wear make up when I do red otherwise I just look like a washed out face with a pair of red lips.
 First thing, prime your lips like you do your face with primer and use foundation too. This will help your color hold and provides a nice canvas to work on. Liner and lipstick just tend to go on better with primer and foundation for me. It is like the lines are smother.
 Following your natural lip shape you are going to line the lower lip. Then, you are going to make an X with your liner directly in the center of your top lip. Using the top of the X go ahead and line your top lip. I know some people depending on their lip shape will go just outside of their natural lip or just inside. When in doubt just follow the natural line that God gave you :-) I don't know why, but every time I try to draw outside of the box I end up looking like a toddler did my make up :-P
 Now, rub your lips together to pull that color through and reline your lips. This helps that color stay put! I like to line my lips again because I need  to know where to "color".
 Apply your red lipstick. If you are nervous dab it on. I always dab on my top lip :-)
 Take your lip gloss wand and color over your lipstick. I like to use this step to even out any messy spots. The wand is my lip saver! :-P The lip gloss is the only thing I will reapply through out the day if needed. The color tends to hold and I really don't have more time during the day to do this entire process (Beauty takes work!).
 This next step is crucial! You have to do it otherwise you will end up with red teeth and that is never a good thing. Take your finger and pull it through your lips. The residue will end up on your finger and not on your teeth later ;-) Make sure you wash your hands or you will get lipstick on everything you touch (I have learned this the hard way).
 Now you are ready for your day, or hot Valentine's Day date :-)
Go lay one on your baby and take a sweet picture. Or embarrass your teenager by kissing him.

Pucker up! :-*

Wednesday, February 11, 2015

Stained Glass Heart Sugar Cookies

 These Stained Glass Heart Sugar cookies are a pretty treat for your loved ones this Valentine's Day and surprisingly easy to make. The goal in creating this cookie was not so much to come up with the perfect sugar cookie, but a pretty special looking cookie. I am not a sugar cookie fan. In fact, truth be told, I rather loathe decorating sugar cookies at Christmas. Not to mention that I find them to taste just "okay" for a cookie that kind of requires a lot of work. I am pleased to report that these cookies are actually the BEST sugar cookies I have ever had. I mean I LIKE THEM! They are relatively easier than any sugar cookie I have ever made as well. There is no chilling the dough and my kitchen did not get as messy with a ton of extra flour. I mean, you will need flour to roll out the dough, but not as much as others.  With that being said, I prefer them without the pretty stained glass feature in the center, but they still are tasty :-) I made up about 6 stained glass cookies and the rest regular cut out sugar cookies that I frosted and topped with decorative dark pink sugar. Nothing fancy, but mixed in with the stained glass cookies it was quite lovely....and.....TASTY!

Ingredients
1 C (2 sticks) unsalted butter brought to room temperature
1 1/2 C sugar
1 egg
2 tsp vanilla extract
2 3/4 C all-purpose flour
1 tsp baking powder
1 tsp salt
1 tsp red food coloring
1 bag of Jolly Ranchers
 
 
Directions:
 
-Preheat Oven to 350 and line a cookie sheet with parchment paper.
-Separate the Jolly Ranchers into flavors and set aside watermelon and cherry to use. I did grape as well and it turned out really yucky. It smelled like cough syrup as it cooked and tasted about like it too. Learn from my mistakes and just don't do it ;-) Set the rest aside for use at a later time. Or you can just suck on them as you make these cookies :-P


-Unwrap the candy and smash them with either a rolling pin or flat side of a meat mallet. They don't have to be really well smashed up. Just enough to spread evenly in the cut out portion of your cookie. Set aside until ready to use.
-In a mixing bowl, beat the butter with the sugar until light and fluffy (I wish butter made me light and fluffy instead of just fluffy).
-Beat in the egg, vanilla extract and red food coloring.
-Sift the flour, baking powder and salt together in a separate bowl.
-Add flour mixture one cup at a time to the sugar mixture. Beat for 20 seconds after each add.
-Divide dough into 2 balls.
-On a floured surface, roll each ball into a circle approximately 1/8 inch thick.
-Dip your cookie cutters in flour and cut out shapes.
These are the ones I used:
-Make sure to cut out a large shape first and center the smaller shape inside it and cut that out too. The small shape can just be used as a regular cookie that you frost normally :-)
-Carefully place cookies on prepared cookie sheet and fill the center with smashed Jolly Rancher. Make sure you do not sprinkle any of the extra on the cookie because it will melt and look icky. In fact, I left a little bit of room between the candy center and the cookie since it melts down.
 -Bake cookies for 9 - 11 minutes or until they are lightly browned.
 -Let them cool completely before removing to a wire rack.
- Embellish them with frosting to hide where the stained glass meets the cookie with your favorite butter cream frosting.
 Place on a cute platter and serve to friends and family.
Be prepared....you will get a lot of "Wow!" and "Those look so cool!" :-)

Saturday, February 7, 2015

Good For You Valentine's Day Granola

First of all I have to state how MAD I am at myself! I made this recipe about a week ago and it was a HUGE success. I pulled out a couple special props to use to do the pictures for THIS post. I had Parker help me (he actually took a few great pictures!) and the photos turned out really cute! I would venture to say that they were probably the most adorable photos I have taken to date of anything I have made. I loved how the final product turned out in my kitchen and on screen. I was super excited to share the recipe and pictures with you all! Fast forward to a few days ago when I am ready to do the blog entry. I pull out the memory disk to my camera and the pictures are GONE! I must have had a brain fart and thought I had downloaded, edited them and put them in my folder "Blog" on my computer. No such luck :-( This lousy picture off my camera with a picture of just ONE of the photos on it is all I got and I took this off of Instagram. Sorry ladies and gents :-(  
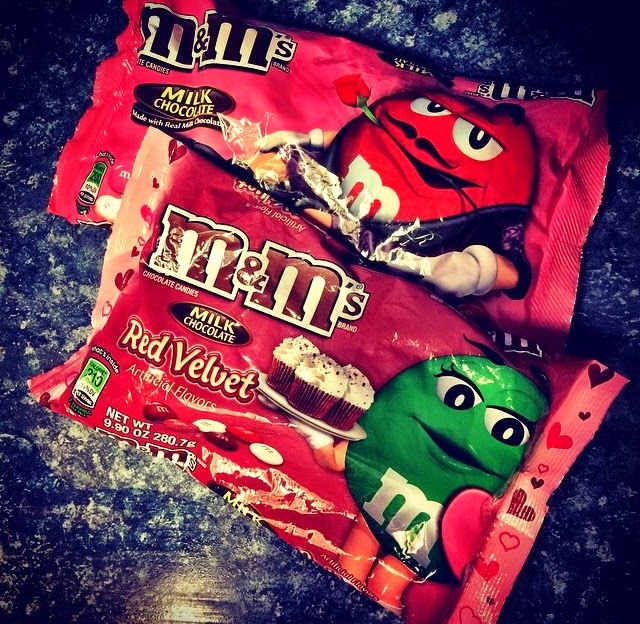
Now that I have expressed my announce with myself and confession to you all out of the way, I do hope that you give this recipe a go at it in your kitchen. It really is quite amazing, easy and good for you as far as granola goes :-) A few weeks ago I found these at Target and asked my online friends what I should do with them:
 

I had a few good suggestions for both, however the Red Velvet ones I ended up just eating out of the bag. I blame it on my monthly friend, but whatever....A few great suggestions came in for the bag on the top, but the one that really caught my attention was from my friend Kim. She recommended Granola Bars. Perhaps it was because of a guilt over eating the entire bag of Red Velvet ones or that that my daughter is a big fan of oatmeal in the morning, but I took that suggestion and ran with it. As I did my research on Granola I was really shocked and alarmed that a food that has a reputation as being so good for you is indeed terrible for you! Ingredients like sweetened condensed milk,  butter (I am a huge fan of butter and think it is way better than the fake stuff for so many reasons) and sugar were the main stars of most recipes. You probably would be better off eating an oatmeal cookie with the crap I discovered is put in it. I knew that none of those were going to work for my recipe -- not because I am a health freak, but because I wanted to come up with something that was good for the heart this Valentine's Day (after all it is national heart month and coming from a family that is plagued with heart disease that is near and dear to my heart). The M&Ms are used so sparingly that they make you feel more like you are indulging than you really are and they make it look pretty :-)
Valentine Granola
 
Ingredients:
 
1/4 C Coconut oil
1/3 C Honey
3 C Oatmeal
1/2 tsp salt
1/2 C Valentine Theme M&Ms
 
Directions:
 
-- Preheat oven to 300 degrees and line a cookie sheet with parchment paper
--In a medium heavy sauce pan melt the coconut oil on low heat
--Add the honey to the coconut oil and mix together on low heat for 3 minutes.
--In a large mixing bowl add the oatmeal and drizzle the coconut oil and honey mixture over it. Sprinkle the salt and mix well.
--Add the M&Ms and mix until thoroughly incorporated into the granola
--Spread the mixture on the prepared cookie sheet and bake in the oven for 12 minutes
-- Let it cool for an hour. Break into smaller pieces and store in an air tight container for up to a week.
 
Our favorite ways to eat this are over yogurt, with a little milk or just straight up out of the jar.


Sunday, January 25, 2015

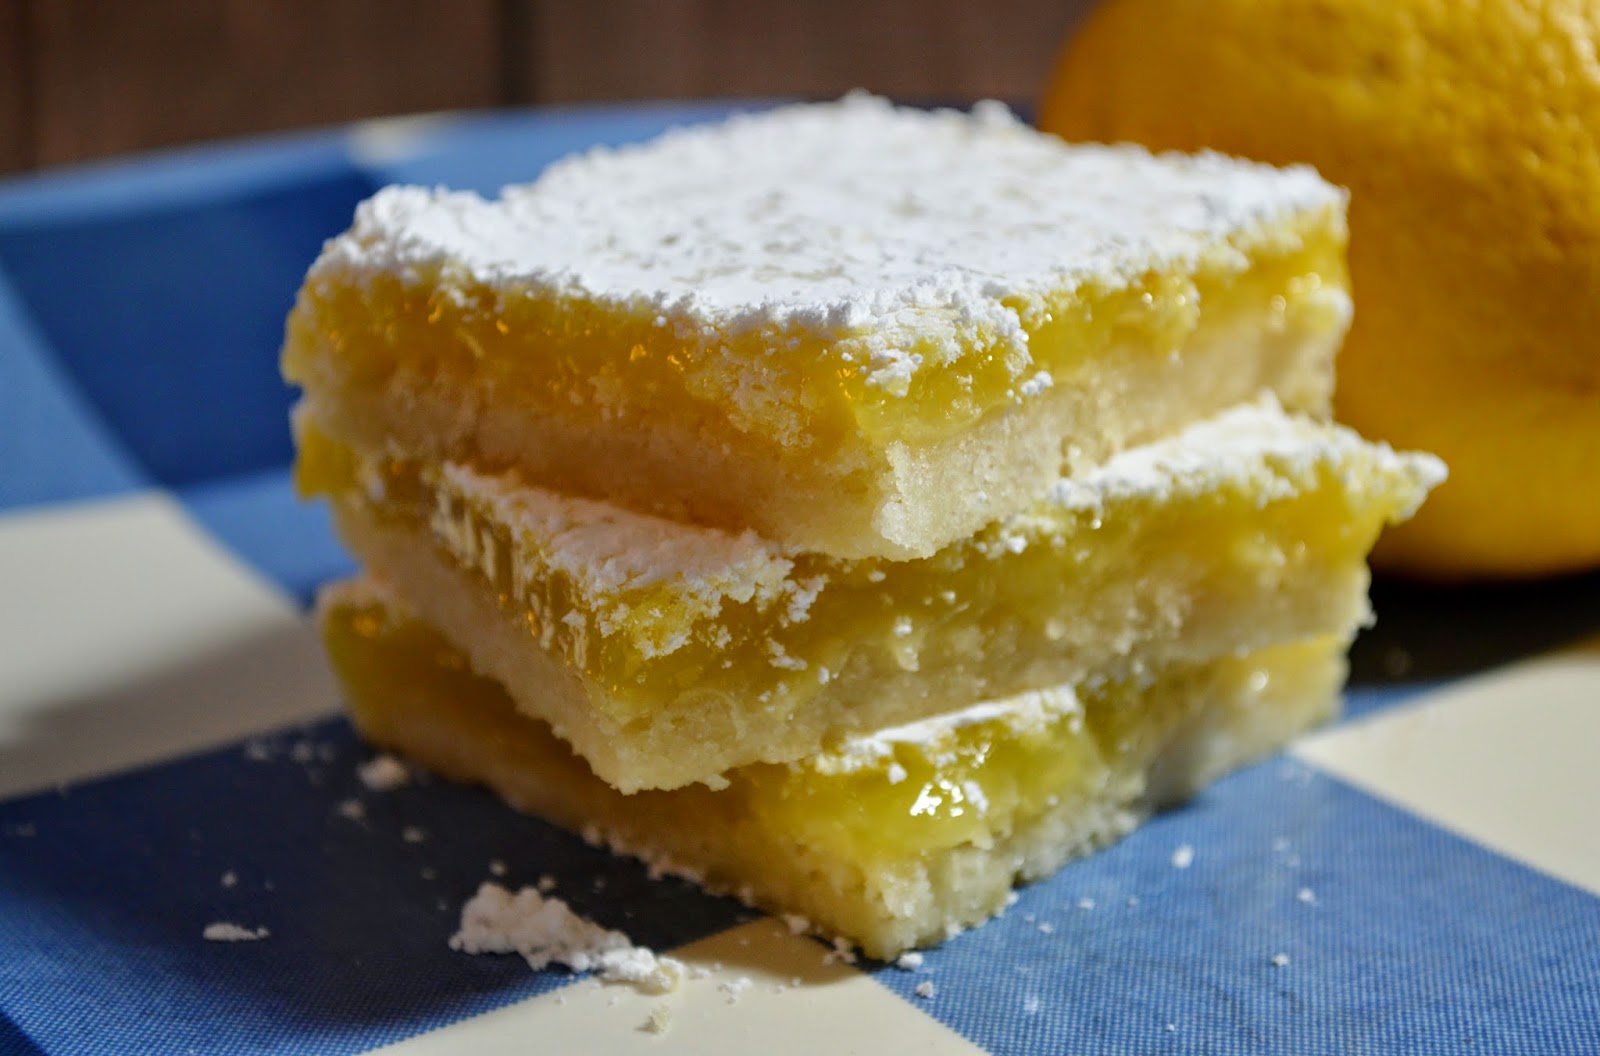
Mom's Homemade Lemon Bars

One of my favorite sweets growing up was my Mom's Lemon Bars. She used to make them periodically through out the year and I would savor each sweet tart bite. The powdered sugar on the top is really what sets these apart! I always thought they were time consuming, challenging and had secret unknown ingredients. As a seven year old the whole world was magical including these Lemon Bars. About 25 years later, after my Mom had given me the recipe, I realized how easy they were to whip up. Just don't leave off the powdered sugar -- it is kind of a big deal :-) 
 
Ingredients:
 
Crust:
3/4 C butter
1/3 C sugar
1 1/2 C flour
 
Lemon Bar (or the guts):
3 eggs
1 1/2 C sugar
3 Tablsp flour
1/3 C lemon juice
lemon zest of one lemon
 
Topping:
Powdered Sugar
 
Preheat oven 300F
 
1) Mix crust ingredients together and press into bottom of a 9x13 pan.
2) Bake for 20 minutes
3) As it bakes, mix the guts up either whisking by hand in a bowl or electric mixer on medium-low speed.
4) After 20 minutes pull crust out of the oven and turn it up to 350.
5) Pour the guts on the hot crust.
6) Pop back in the oven for 20 minutes
7) Do not let these overcook! They will continue cooking as they cool and firm up.
8) Let them cool for about 30 minutes and sprinkle with powdered sugar.
9) Continue cooling for a few hour or until firm. Cut into bars and have at it :-) 
 

Tuesday, January 20, 2015

Lemon Loaf

As I have mentioned previously, we have a lemon tree in our backyard and this year we are yielding quite a large crop (does that even make sense? It sounds educated and smart!). You know what that means, I am coming up with recipes left and right on using the lemons! Today I made a divine lemon loaf. This is seriously delicious!  It is moist yet dense, tart and just the right amount of sweetness. If you have a lemon to spare, make this! You will not be disappointed :-)
 Lemon Loaf
 
Ingredients:
1 1/2 C all- purpose flour
1/2 tsp baking powder
1/2 tsp baking soda
1/2 tsp salt
3 tblsp cornstarch
3 eggs at room temperature
1 C sugar
2 tblsp butter at room temperature
1 tsp vanilla extract
2 tsp lemon extract
1/3 C lemon juice
1/2 C vegetable oil
zest of 1 lemon
 
Glaze:
1 C powdered sugar
2 tblsp heavy whipping cream
1/2 tsp lemon extract
lemon juice to thin if needed  
 
 
Preheat oven to 325 F
 
1) Grease and flour a 9x5 glass loaf pan.
2) In a large bowl sift together 5 times (yes, FIVE...I know that seems obsessive, but it helps incorporate the dry ingredients because you don't want to mix it to much when you add your wet to it because it will make for a dry lemon loaf, but we will get to that later) flour, baking powder, baking soda, salt and cornstarch. Set aside.
3) In a mixer beat together on medium eggs, sugar, butter and vanilla extract.
4) Slowly pour in the lemon extract and lemon juice with the mixer on low. The batter may curdle a bit and by adding it as it mixes it helps it not curdle as bad (but it still well and this is normal).
5) Add the oil and lemon zest to the batter on medium low speed until combined.
6) Make a well in your flour mixture like so:
 
7) Slowly pour the batter into the well in the flour mixture.
8) Fold together the wet and dry ingredients until just combined. It is critical that you do not over mix the batter at this point because it will cause the loaf to be a bit dry.
9) Pour the batter into the prepared pan and bake for 55 minutes or until a toothpick comes out with just a few crumbs attached.
10) Cool for 30 minutes and glaze the loaf
11) To make the glaze simply combine the powdered sugar, whipping cream and lemon extract. If it is to thick (you want it on the runny side) add a little bit of lemon juice until you have the right consistency.
This is a great loaf to serve with afternoon tea or coffee! 

Thursday, January 15, 2015

Salted Toffee Bars

I wanted to get back into my kitchen this week and whip up a treat. However, I wanted it to be different than my usual cookies and cupcakes. I also wanted a break from chocolate (I know....what is wrong with me, right?). I have been craving something salty, sweet and rich so I came up with these awesome little nuggets of heaven! Not really nuggets of heaven, but you get the point :-) The shortbread crust paired with the caramel butterscotch center and topped with toffee bits and sea salt make it the perfect two bite treat. 
 This recipe is a little bit of work, but really require little measurement and ingredients. The hardest thing is waiting for them to cool so you can eat one. Even that process can be speed up by placing them in the refrigerator for about two hours instead of leaving them on the counter over night. I mean, let's be honest, if I were to have left them on the counter before they were cool I would have just taken a fork or spoon to the pan and made a meal of it.

Preheat oven 350

1) Line a 9 by 13 pan with foil and spray with nonstick cooking spray.
 2) In your mixer combine the butter, brown sugar and flour until it resembles this:
 3) Press the crust into the pan as evenly as possible.
 4) Bake for 15 minutes.
5) As the crust bakes combine in a heavy sauce pan the can of sweet and condensed milk and butter. Stir constantly as the butter melts and the mixture becomes warm.
 6) Take the crust out of the oven after 15 minutes and carefully pour the milk mixture over it.
7) Return to oven for 15 minutes until milk mixture is darker and bubbly. It is okay if the edges are a little too dark. You are just going to cut those off :-)
 8) Sprinkle the butterscotch chips over the hot milk mixture and return to the oven for 4 minutes,
 9) Smooth and spread the butterscotch to the edges.
 10) Top the butterscotch with sea salt and let cool completely before cutting into bars. 
 Yummy for my tummy :-)
 Get in my belly!

Ingredients:

Crust:
3/4 C butter brought to room temperature
3/4 C brown sugar
1 1/2 C flour

Filling:
1 can sweet and condensed milk
4 TBLSP butter

Topping:
2 C Butterscotch chips
1 1/2 C Toffee bits
1 TBLSP sea salt

Monday, January 12, 2015

Deconstructed Lemon Cream Pie

We have a lemon and orange tree in our backyard and right now there are about 100 lemons on our tree! I thought it would be fun to make individual deconstructed lemon cream pies for the family in mason jars. I was quite surprised with how easy it ended up being. Give it a try!
 
 
Ingredients:
 
Lemon Custard:
1 C sugar
juice from one lemon
5 eggs
1 stick of butter
 
Whipping Cream:
1 pint heavy whipping cream
1/2 C powdered sugar
 
Crust:
 
Lemon wafers or lemon cookies (no cream filling though!)
 
Lemon Garnish:
 
Zest of 1 lemon (zest the lemon you are going to use in the custard first before you juice it.)
 
2 TBLSP of sugar
 Combine everything except for the zest of a lemon in a heavy weight pot.
 Whisk it at a moderate pace over medium low heat.
 Until it thickens up and looks like the picture below (about 8 minutes). Pour it in a glass bowl, cover with plastic wrap and refrigerate over night or at least 4 hours. I whipped up this custard the night before and let it set up over night.
 Zest your lemon and mix with sugar. Set your zest out on wax paper until ready to use. I usually do this as I make the whip cream. Speaking of whip cream lets do that next!

Pour all of your heavy whipping cream (1 pint of it) into a stand mixer bowl. Add powdered sugar and beat until thick and luscious.

In the meantime, smash your lemon cookies up into crumbs using a mallet and a gallon sized ziplock bag.

Now, it is time for the fun part! Layer lemon custard in five medium sized mason jars. Sprinkle on the cookie crumbs and then the whipped cream. Do this one more time and top with sugared lemon zest. Put a lid on each jar and refrigerate for at least two hours.
 When ready to serve, you can put a spoon in the center of each (It will stand up nicely :-) )  or you can just serve them straight out of the fridge :-)
On a personal note, I do not like 5 eggs in the custard because it taste to "eggy" to me (if that even is a word). I was the only one that noticed it, however. It could be because I knew there were five eggs in it, therefore was subconsciously looking for it on my taste buds. I prefer this with 4 eggs, but 5 gives it a nice consistency and texture. Rumor has it that you can actually treat the custard as lemon curd to use on scones if you have extra. I did not have extra so I just don't know about that ;-)

Thursday, January 8, 2015

Make a Cape Drape

 Isn't she fashionable in her cape and Wonder Woman pajama pants? This is not about those awesome PJs she has on, it is about the amazing cape! And check out the back! It is just about as cute as the front:
 The great thing about this cape is it works for many body shapes and sizes. Above is my 12 year old daughter and below is me -- a curvy tall woman:
 I first discovered these capes over the 4th of July weekend with my Mother-in-law. We both were enthralled with them and walked away with a couple we found at a retailer. I have worn mine from time to time, but really have forgotten about it in the winter months (it is made out of a light jersey fabric). Then, my hair stylist stylist pulled out a fleece one she made and told me how easy it was to do. It required three cuts and no sewing. So I set out to make my own!

This is seriously the easiest and best DYI I have ever completed. It takes literally little creative talent, a few supplies and only 15 minutes (we timed it on the third one and if you have all your supplies ready to go it takes 7 minutes). You are going to need 1.67 yards of  fleece, yarn, scissors, (as you can tell I bought myself a pair just for this because I know just enough about sewing that you never use your paper scissors on fabric and vice versa), a pencil with a good eraser on it and either a fabric pencil or tailors chalk. I also had a fabric eraser on hand, but really did not need it to erase my marks I made.
 First you are going to fold your fleece into fourths making a square and smoothing out all the wrinkles like so:
 Tie one end of the yarn to your pencil close to the eraser:
 Measure the yarn out to the end of the fleece square cutting it about an inch shorter:
 Tie the other end of the yarn to your fabric pencil or tailor chalk:
 This is the most challenging part because you have to make your circle by holding the eraser with the yarn to the folded corner and using the other end as a compass of sort. Keep the fabric from bunching and you need to make sure you can see the semi circle you are drawing. I had my daughter hold the pencil in place as I pulled the other end taut and drew my semi circle. I had to go over some areas a few times:
 This is what you are left with:
 Do you see the line? Did it make a good semi circle? Good! Now take those scissors and cut on the line to get this:
 Before you open it mark the corner with your chalk so you know the center point. You can barely see my mark, but it is there:
 Open your semi circle up into a half circle making sure the folded side is facing you. It is time to measure out the arm holes (or head holes depending on how you wear it. No you don't have multiple heads, but you do have options on where to put your arms and head, but we will get to that later). From your center spot measure over 8 inches. Now, flip the ruler and draw a 7 inch line (I know you totally want my heart ruler. It is awesome!):
 Repeat on the other side and cut so that it resembles this:
 Now, open that bad boy up and wear it with a belt (and Wonder Woman pants if you feel so inclined and are a cute tween like my daughter ;-P ):
 You can even throw it over your head for a hood. I imagined myself in a red cape as Little Red Riding Hood:
 Or you can just wear it loose:
 Try putting your head through one arm hole and one of your arms in another:
 Make another one in a different pattern:
 Find your favorite winter team and have at it:
 Make a scarf if you have extra fabric by cutting a long strip and fringing the edges:
 Make another one for those gals in your life and let them show you their favorite way to take it out on the town (or back to bed if wearing Wonder Woman pants....it does make a nice warm type wearable blanket).
 
 
Not only is this super easy and fast it is really CHEAP! I found all my fleece on sale and each cape cost me about $10 and 10 minutes of my time to make. These retail for $45 online and upwards of $100 in stores. This is a great piece to have in your wardrobe during the winter too! It economical enough to make several to wear with your outfits that will keep it interesting and chic :-)

Until next time -- HAPPY CRAFTING :-D