Saturday, December 20, 2014

Festive Christmas Cheer Cookies

 
I have been intrigued by the red and green baking chips the past few Christmas seasons, but have never known what to do with them. I would see them on the shelf at the market, pick them up, fondle them and immediately put them back. This year I decided to pick some up and give them a try in my baking. I am sure glad I did! I came up with these amazing cookies! I altered my traditional chocolate chip recipe and rolled them through festive Christmas sprinkles. Though, the base is similar to my chocolate chip cookies the taste is different and oh so good. If you still need or want one more cookie for your Christmas cookie tray that will not only taste out of this world, but will also add that special Christmas feel whip up a batch of these today!
 

Ingredients

4 1/2 C flour
2 tsp baking soda
4 tsp cornstarch
1 tsp salt
1 1/2 C brown sugar
1 C sugar
3 bars of unsalted butter melted
3 large eggs
2 Tbsp vanilla extract
1 bag (equal to 2 cups) of red and green baking chips by Nestle
Christmas colored sprinkles

Preparation

1) In a large bow, sift the flour, baking soda, cornstarch and salt together twice.
2) In a separate bowl, whisk together the sugars and butter until smooth.
3) Add the eggs and vanilla and whisk until well incorporated.
4) In the center of your flour mixture, make a hole by pressing your flour to the sides of the bowl. Carefully pour the wet ingredients in and mix until combined.
5) Fold the baking chips into the dough.
6) Cover with plastic wrap and refrigerate for at least 3 hours.
7) Preheat the oven to 325 F degrees and line a cookie sheet with parchment paper.
8) Take about 2 - 3 Tbsp of dough and roll into a ball.
8) Roll the ball in sprinkles making sure to get good coverage.
9) Place on prepared cookie sheet at least 2 inches apart from other cookies
10) Bake for about 10 minute or until the tops are light golden. Let cool on sheet from 3 minutes and transfer to wire rack
11) Store cookies in a sealed container for up to 5 days or freezer for 3 months.

Monday, December 15, 2014

Black and White Fudge


What cookie tray or treat dish is complete without at least one type of fudge on it? Today I am sharing with you an easy pretty much no fail fudge recipe that is pure perfection. You can even swap out the white chocolate chips for peanut butter, mint, or butterscotch chips. The texture on this fudge is not too hard and not too soft. It is just right. It also holds up nicely and does not get sticky all over your fingers when you eat it. The trick is to only keep the chocolate mixtures on the heat until all the chips are melted and stir it constantly as it melts down. Make sure you add the vanilla extract after you remove from the heat or it will cook out. Enjoy!

Ingredients

1 bag of semi-sweet chocolate chips (2 cups)
1 bag of milk chocolate chips (2 cups)
1/2 Cup of white chocolate chips
2 cans of Sweetened Condensed Milk, divided
1/4 Cup + 1 tablespoon of unsalted butter
1/4 teaspoon salt
1 tablespoon + 1/2 tablespoon of vanilla extract

Preparation

1) Line a 9x9 metal pan with wax paper. First line the bottom of the pan and up over the side with paper making sure it overlaps the edges. Smooth out the bottom and the edges. Now, turn the pan 90 degrees and repeat.
2) In a large sauce pan melt together the chocolate chips, 1/4 Cup of unsalted butter, salt and 2 Cups of the milk. Remove from heat and stir in 1 tablespoon of vanilla extract.
3) In a small heavy saucepan melt together the white chocolate chips, remaining milk and 1/2 tablespoon butter. Remove from heat and add 1/2 tablespoon of vanilla extract.
4) Pour the chocolate mixture into prepared pan smoothing out the top to make it level. Drop it a few times on your counter about 2 inches from the surface to level it out and remove any bubbles.
5) Dab white chocolate randomly on chocolate.
6) Take a knife and gently swirl white chocolate in the chocolate making sure not to mix it in.
7) Place in refrigerator for 4 hours.
8) Carefully remove from pan and remove the wax paper. Cut into 1 inch squares and store in air tight container in refrigerator or freezer.

Friday, December 12, 2014

Peppermint Crunch Cookie

 
Don't those just look delish? Trust me -- they are! Peppermint Crunch Cookies are Santa's favorite cookie in these parts. A lot goes into these to make them the perfect holiday treat. It starts off with the standard cookie ingredients and then you add oats. The oats give the cookie it's unique texture. Next you toss in the coconut which gives it a nice sweetness to each bite. Pecans are sprinkled and this gives the cookie a rich depth. Lastly, the Andes Peppermint Crunch Baking Chips are tossed in. The chips just push this cookie over the top with that fantastic minty overtone.
 
 
Now, the trick to making these cookies is actually not in the making, but in the FINDING of the Andes Peppermint Crunch Baking Chips. I originally stumbled upon these chips three years ago. They were in every market I went into. I picked up a bag of them simply because I had seen them everywhere.  I made these cookies for the first time that year and Santa announced that those were his favorite cookie EVER. I knew at that moment that these would become a staple in my holiday baking. Fast forward to 2013. I had a bit of a hard time locating them, however right after Thanksgiving my local market carried them for about two weeks. Luckily I had grabbed a bag so I was not disappointed when they sold out and did not reorder (yes, I check every time I went to the market because I wanted a bag in reserve). Finding them this year has been an entirely different experience. None of the markets I shop at  (and I shop at 4 on regular basis) have carried them! I ended up posting on Facebook about it and asking if anyone has seen them to please let me know. No one within a 5 mile radius of me spotted them in any stores. They were seen east and north, but not where I am. I started to come up with alternative plans for the cookie (you can chop up the Andes after dinner mints pictured above in place of the baking chips if needed) and then a friend found them and bought me TWO bags. Not only did she purchase them she also drove to them to me on the way to a professional football game to give them to me. How sweet is that? She totally saved Christmas! Well, not really, but kind of, but not really...you get what I am saying right?
 
So, when you are ready to make these make sure you pick up the RED bag of Andes baking mints and not..... I repeat NOT the green bag. The green bag are not the same thing. You will need these:


I discovered (about a week to late) that you can order them off of Amazon as well. I plan on doing that next year. They come in a case of 6, but the expiration date is good for at least two years and I usually use two bags a year.
 
Without further delay here is the recipe:
 
servings 2 dozen
active time 2 hours
total time 2 hours

Ingredients

2 sticks unsalted butter microwaved for 30 seconds
1 C packed dark brown sugar
1/3 C sugar
1 egg
1/2 TBLSP Vanilla Extract
1/2 tsp baking soda
1/2 tsp salt
1 3/4 C all-purpose flour
1 C oats
1 1/4 C sweetened shredded coconut
1 C chopped pecans
1 1/2 C Andes Peppermint Crunch Baking Chips

Preparation

Preheat oven to 300 F
Line a cookie sheet with parchment paper.
Microwave your butter for about 30 seconds if it is not room temperature.
Using an electric mixer cream the butter and sugars together until fluffy.
Scrape the sides of the bowl, add the egg and vanilla.
Mix until well incorporated.
On low speed add the baking soda, salt and then the flour.
Stir in oats, coconut, pecans and baking chips until thoroughly incorporated.
Roll about 2.5 tablespoons of dough into balls and set on cookie sheet at least two inches apart from one another.
Bake for approximately 15 minutes or until the cookies have set up nicely and are starting to turn light brown on the edges.
Let cool on cookie sheet for 5 minutes, then transfer to wire rack.
Store in a sealed container for up to 5 days or in the freezer for up to 6 months

Thursday, December 4, 2014

Healthy Pumpkin Ice Cream

Do you have a can of left over pumpkin?  I did and it was going to expire this summer. I am not a huge pumpkin pie fan and really was not into baking much with it this season and did not know what I was going to do with it. I then decided to challenge myself by making it into something healthy. So, I came up with -- Pumpkin Ice Cream!

Now before you dismiss this blog post and shake your head in shame thinking "how can she as a baker go HEALTHY here?" Please understand that nothing I ever make taste icky. This is really good!

What in this ice cream makes it healthy?  Well.....everything! The canned pumpkin is a nutrient dense food that provides 28% of  daily fiber based on a 2000 calorie diet per one cup. It is also rich in vitamin A (supports visual health), contains Iron and Vitamin E, and is high in potassium which helps control blood pressure and cramps kids get when going through a growth spell. The bananas lower the risk of cancer and asthma as well as blood pressure. They also contain tryptophan an amino acid that may play are role in preserving memory and boosting a gloomy mood. The honey helps prevent heart disease , reduce ulcers and throat irritation. It is also anti-bacterial ad anti fungal. Lastly, the walnuts are good for the brain (they even look like little brains), reduce the risk of breast cancer, rich in Omega-3 fatty acids, reduces risk of diabetes, contain antioxidants that boost heart health and deal with stress.

Please note that I am not a doctor or nutritionist. Nothing I stated has been through the medical field, but rather through personal study and research. Please contact your health care provider or licensed nutritionist for further investigation or to address specific concerns.

Are you ready for this amazing recipe that is super easy to make and can satisfy your sweet tooth? Here it is:


List of Ingredients 

  • 1 (15 ounce) Canned Pumpkin
  • 6 Bananas
  • 1/3 C honey
  • 1.5 teaspoons of Pumpkin Pie Spice
  • 8 chopped walnuts (as a topping)

How to Cook

  • In a blender place bananas, canned pumpkins, honey and pumpkin pie spice.
  • Blend until smooth and no lumps remain
  • Pour into a freezer safe container and freeze
  • Let thaw for 15 minutes on counter and use an ice cream scooper to serve.
  • Top with walnuts and enjoy!

Monday, December 1, 2014

Marbled Chocolate

I have a delicious and beautiful MARBLED CHOCOLATE recipe to share with you today.
 
Don't let this gorgeous picture fool you. It really is not hard to make and requires little time and effort on your part. You do need to allow about an hour to let it firm up in your refrigerator, but other than that it will take you no longer than 7 minutes to put together (maybe 8, but that is an even number and I like odd, but I am not a fan of 9, so we will say 7).
 
I like to break mine apart into pieces instead of cutting them. Strange really I mean I am  OCD and want everything uniform one would assume that I would want to take out a ruler and cut this into perfect little square. However, I like to break them apart roughly and place in a big mason jar. Truth of the matter is I tried to cut them apart the first time I made it and I could not get them perfect. So, I threw caution to the wind and embraced the "mistake" by making it look intentionally rustic. Yeah...that is what I did....that is my story and I am sticking to it!


List of Ingredients

  • 8 1/2 Graham crackers broken in half (17 squares)
  • 6 squares semi sweet baking chocolates
  • 1/2 C creamy peanut butter
  • 3 squares white baking chocolate

How to Cook

1) Line a cookie sheet with foil making sure to extend ends up over the side of the pan.

2) Arrange crackers on cookie sheeting cutting as needed to make it all fit.

3) Microwave semi-sweet chocolate and peanut butter on HIGH for about 1 1/2 minutes or until chocolate is completely melted when stirred. Make sure to stir every 30 seconds.

4) Stir until well blended and pour over crackers. Spread chocolate mixture with a spatula to cover crackers completely.

5) Now, do the same with the white chocolate - melt in the microwave.

6) Drop by spoonfuls the white chocolate over chocolate covered crackers.

7) Immediately cut through the chocolate mixture with a knife several times for a marble effect taking care not to press to hard and break the crackers.

8) Refrigerate at least 1 hour or until firm. Use foil handles to remove from cookie sheet. Peel off foil and break into bars.

Tuesday, July 22, 2014

July Bombshell Sketch

I hope summer is finding you well and you are able to take some time to relax! We have been doing lots of day trips and enjoying these last few weeks before school starts.

I have been trying to catch up with my scrapbook and completing a page a day in July. I have missed my pin ups and decided to pull out this month's girl (Hawaiian Girl) and use this great sketch to make a card:


This is my take on it:

 
Head on over to bombshellstamps.com and be inspired! Until next time -- Happy Crafting :-)

Wednesday, May 21, 2014

A Couple May Bombshell Stamp Challenges

There are some GREAT challenges going on at Bombshell Stamps! If you have not checked them out head over and take a peak. Here are my takes on them:
 This is the "Hip to Be Square" challenge. I thought I would turn it into a magnet, but then I realized it was cute on this canvas page:
 Here is my take on this month's sketch. I love my sailor girl! The only down side is that the striped washi tape rolled somewhere in my craft room after I finished this card and I can't find it :-( I really like it too!
Until next time -- HAPPY CRAFTING!

Sunday, April 27, 2014

Butterfly Queen

One of my recent journal topics was stars. I made this:
Please visit Bombshell Stamps for more fun stuff!
 
Until next time -- HAPPY CRAFTING!

Friday, April 25, 2014

3 Generations

I am not fortunate in that I do not live close to my Mom. However, I am lucky that I got to spend last Thanksgiving with her. This is her, my daughter and me.
Until next time -- HAPPY CRAFTING!

Wednesday, April 23, 2014

Mini Album for Earth Day with BOMBSHELLS!

Yesterday was Earth Day and I created a mini album for it. Here are a few pictures:


To see the rest of it and links to the stamp sets I used please visit Bomshell Stamps .
 
Until next time: HAPPY CRAFTING! :-D

Monday, April 21, 2014

Once Upon A Time....

...there were two beautiful cousins who were a year apart and went to the same school. This is my daughter and her cousin on the first day of school.
Until next time -- HAPPY CRAFTING!

Saturday, April 19, 2014

New Car

First time in my adult life....well...in my life EVER that I have purchased a brand spanking new car! True it is a van and I really did not want to do the Mom vehicle, but once I realized that my tall children (more like tall son 6'1 and only 13) could not comfortably sit in anything else I knew this was it.
Until next time -- HAPPY CRAFTING! :-D

Thursday, April 17, 2014

Peek-A-Boo!

I see you!
Just a card I made with a digital stamp. To find out more about this stamp and other cool stuff please visit Bombshell Stamps.
Until next time -- HAPPY CRAFTING!
 

Wednesday, April 16, 2014

Mmmmmm.....Sugar Daddy!

I altered a sweet little box and filled it with candy.

Please visit Bombshell Stamps for link to the stamp set and see other amazing stuff!

Until next time -- HAPPY CRAFTING!

Monday, April 14, 2014

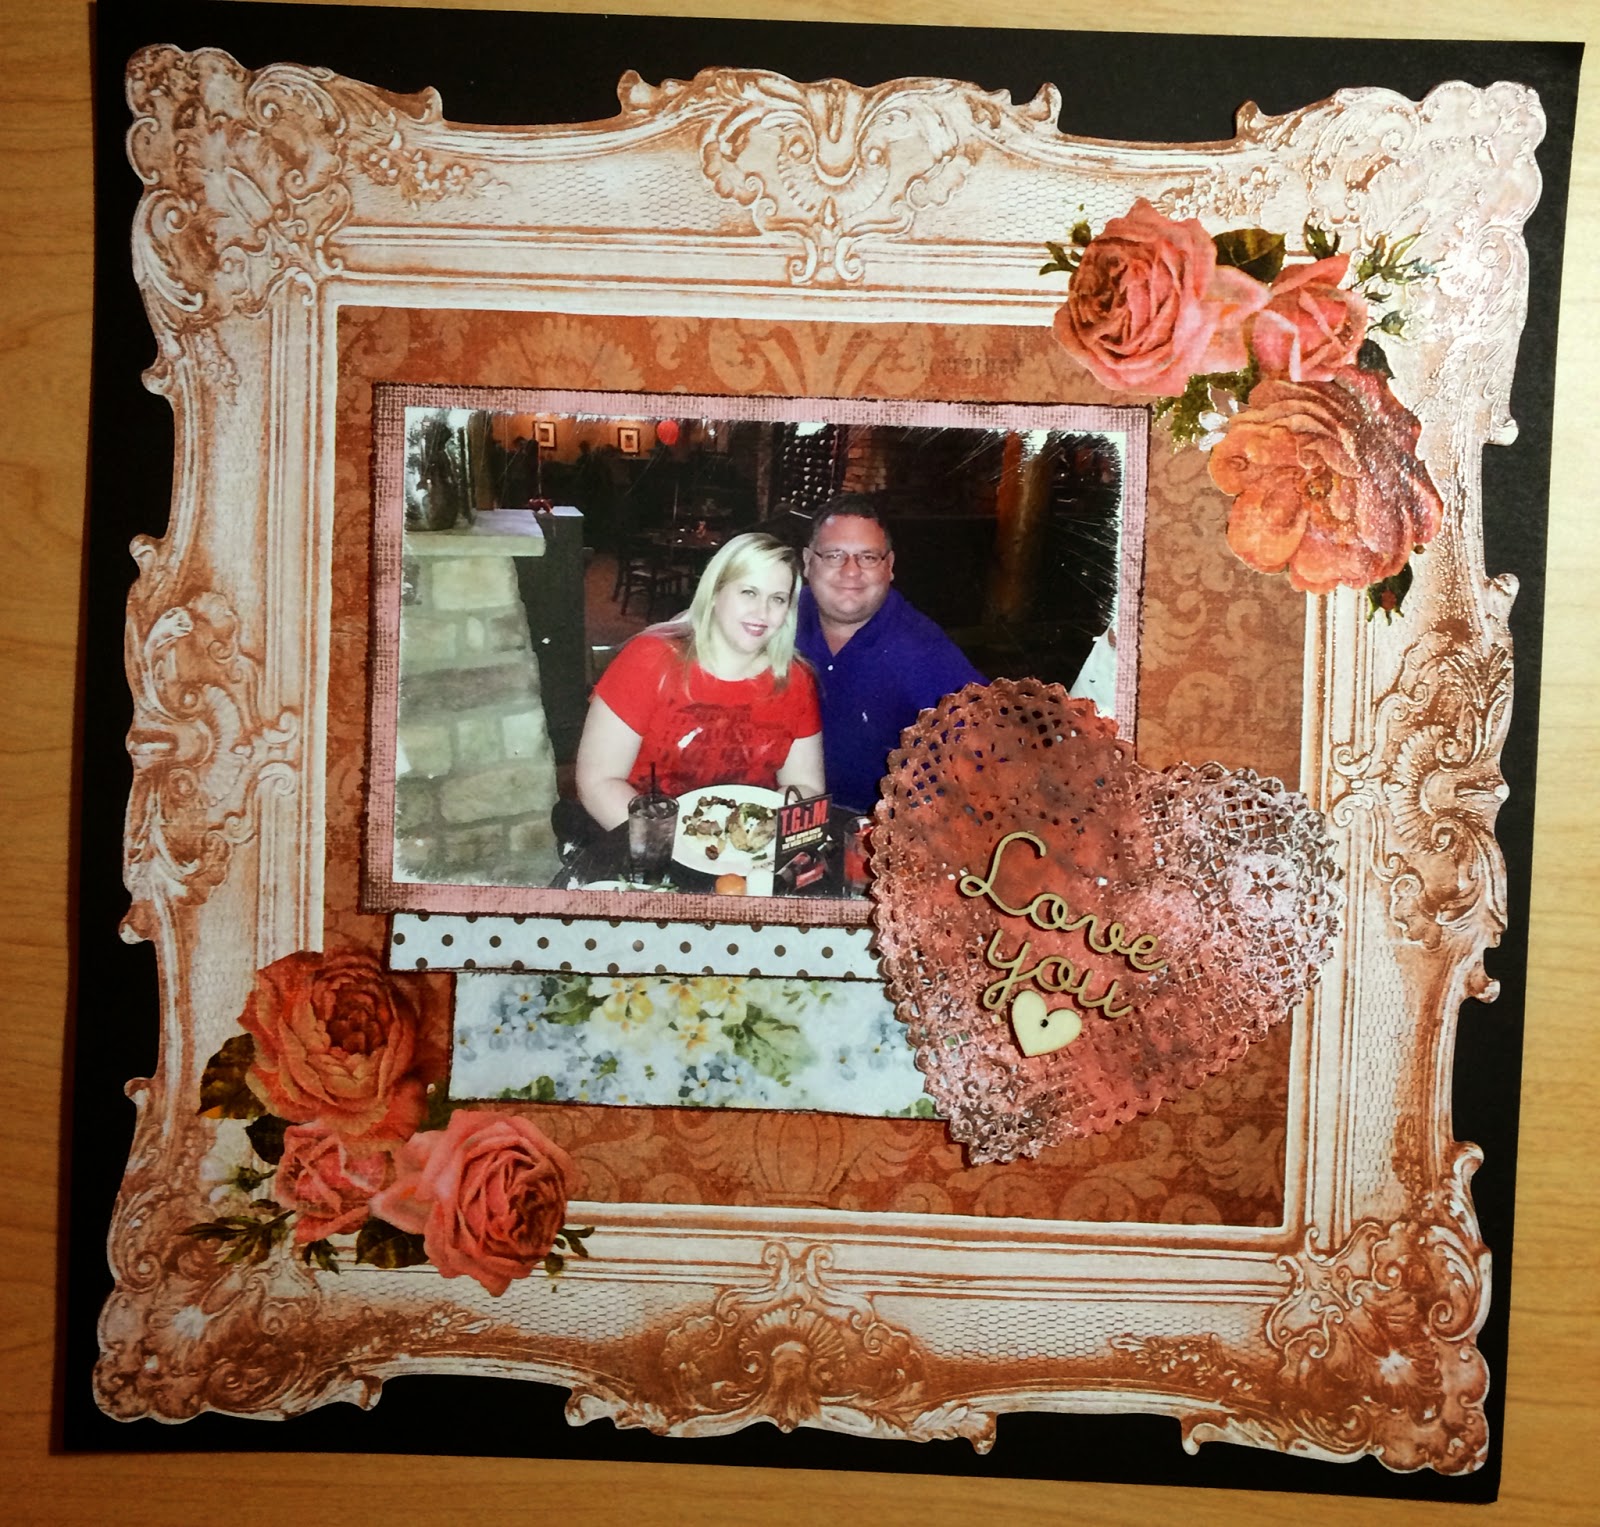
Love You

I gave into my temptations and got the March kit from Flying Unicorn. It seemed appropriate for a Valentine page.

Until next time -- HAPPY CRAFTING! :-D

Thursday, April 10, 2014

Pin Up Calendar

I made a calendar with my BOMSHELLS. I have not added the dates yet because I am not sure what year it will be used just yet.


To see the rest of it please visit Bombshell Stamps.

Until next time - HAPPY CRAFTING :-D
 

Monday, April 7, 2014

Bottom's Up!

I recently went to a local brewery and sampled some beer. Of course I had to take pictures! Here is the page I made and a close up of Man's Ruin:

Make sure to visit Bombshell Stamps to see more projects with this month's stamp and a link to purchase. It is on sale this month!
 
Until next time -- HAPPY CRAFTING! :-D

Wednesday, April 2, 2014

JUNK CHALLENGE

I am hosting a fun challenge over at Bombshell Stamps. Please head over to their blog and check it out: www.bombshellstamps/blogspot.com .

Here is my take on it:


What are you waiting for?!?!?!?! You are still here???? Get over to Bombshell Stamps and check it out!!!!!

Until Next Time -- HAPPY CRAFTING :-D

Tuesday, April 1, 2014

Ms. April

...is what I am over at Bombshell Stamps! Head on over and check it out!

http://www.bombshellstamps.com/blog.html

I have a really GREAT challenge that I hosting that will be on the website April 2. Please go check it out and play along. In the mean time, here are some things I have created over the last few months with "Bombshell Stamps".


If you are not already subscribed to my blog or the "Bombshell Stamps" blog please do so! That way you won't miss out on the challenges, chance to win prizes and FUN!
 
Until next time -- HAPPY CRAFTING! :-D

Saturday, March 22, 2014

March Bombhsell Sketch Challenge

Hello friends :-) I hope the weekend finds you well and you are able to spend a little time creating. I took about an hour and completed the March Sketch Challenge from Bombshell. The link is : http://www.bombshellstamps.com/blog.html

Here is a picture of the sketch:


Here is my take on it:
I used a large tag from my stash, glimmer misted, distressed the edges of the boxes and stamped away. If you are interested it participating in the challenge there still is time! Head over and upload your entry. I would also like to see your take on it, so put your blog link in my comment section.
 
Until next time -- HAPPY CRAFTING!


Saturday, February 15, 2014

A Look Into my Craft Room

We put in new floors about a year ago and in the process I was able to redo my craft room! I actually snapped a few photos of it because it was clean and thought I would share.

This is what I keep on my desk. The small one houses small alphas and just stuff. The big one houses my journal and thickers:
 Here is my organized clutter! I love a good peg board :-)
 Here is my Cricut area as well as my CTMH stamps:
 The room from the door:
Until next time ;; Happy Crafting!

Thursday, February 13, 2014

You Want Me To Do WHAT?!?!?!?!

I almost threw in the towel on art journaling because of a recent prompt. I was challenged to draw and not only just draw, but to create a picture of ME! I don't draw. That is why I scrapbook and stamp. I don't have artistic ability (or so I thought). I mean, my entire family can draw, but it skipped me. I will never be as good as them, so why bother. Once again, I had to get over myself and just give it a go. So, here is my self portrait:
 I totally drew a grid on my paper and penciled a face. Do my eyebrows now rock! The one on the right really could be my eyebrow. HA!
 Then came the fun part -- Adding color! I had to draw in my blue eyes and then had fun with my hair.  Well, my friend, Erin liked it so much that she asked me to do her. I told her that it would not be that much different than mine because I am a bit limited on what I can do at this time skill wise. This is what I came up with for her:
Until next time -- Happy Crafting!

Wednesday, February 12, 2014

Dumpster Diving!

Okay okay okay! I really did not go dumpster diving, but I did dive into my stash and created both of these pages with only things from my stash! 

Until next time - Happy Crafting!