Showing posts with label tattered angels. Show all posts

Friday, September 28, 2018

HUGE Fall Blog Hop!

Hello Friends! Thank you so much for stopping by today. You are in for a treat! Today I am participating in a  MEGA BLOG HOP!!!!!! There are lots of fantastic designers world wide that have come together to showcase terrific fall projects that you can recreate and put your own artistic touches on in your craft room. You have seen a lot of these designers featured on sites like Tattered Angels, 7 Gypsies and and Canvas Corp Brands! Do you see a trend? This is the  CCB Fall Blog HOP! Each of these designers have created a project to share with you on their blog. Some are offering prizes, so please hop on through to each blog. If you are inspired would you be so kind as to share the hop with others? We would truly appreciate it!

I am sharing with you a banner I created:

I found a CCB banner kit in my stash that I thought would be perfect for Halloween:
I used the black and white polka dot paper from the kit as a template to create the pieces. I first cut out the smaller piece and traced it 1/4 inch larger on different substrates as a backing:

I misted each piece with Tattered Angels Glimmer Mist and set them aside to dry:
I used the Halloween Kraft pack to create the smaller pieces of the banner:

I found some wonderful  images from the mini art fall paper pack that I painted with glimmer mist. I loved playing on this paper because it was such a beautifully strong substrate that withstood a lot of water. I waited for everything to dry and assembled the banner. I cut a few canvas strips to sew on to the top of each piece to hang from the rope provided in the kit. To finish it off I found gold chipboard letters that are probably over a decade old in my stash to spell out "SPOOKY". 


I am giving away a small goodie bag filled with handmade (by me) cards, ATCs and supplies to one lucky winner. All you need to do is subscribe to my blog and leave a comment stating your favorite thing about fall. I will announce a winner on this post OCTOBER 5 2018! 

Please make sure you hop on through to the next blog in the list:

YOU ARE HERE: Scrappy Cafe (Betz Golden) https://scrappycafe.blogspot.com/…/…/huge-fall-blog-hop.html
Marie Nicole Designs (Marie Heiderscheit) https://marienicoledesigns.wordpress.com/…/farmhouse-autumn…

Also, make sure you check out the Canvas Corp Brands Shop for all your Fall paper crafting needs here.


Until next time ~ Happy Crafting! 


Thursday, July 19, 2018

Updating my Craft Desk

I have been working on the same desk for two decades and though I love it, it is time to bring it into this century. I purchased this desk as part of a set as Costco. It has been in a few different rooms in my home, but about seven years ago it finally found its resting place in my craft room. I like how much work space I have on it. It also is well made and sturdy.

 Not only did I want to change the color, I also wanted to clean and cover many of the paint and mist spots I had on it from creating. I wanted to go with a color that would benefit from my mess -- add character. I gave it a good cleaning and tried to remove as much of the dried on glue as I possible. I then had my boys cover my work area with a large plastic tarp.
 I decided to first paint the desk in Ivory followed by Jade . I purchased two jars of it.
 I was skeptical when the instructions stated the desk did not need to be prepped. I just needed to make sure it was free from dust. However, not only did the Ivory paint go on beautifully, it dried fast! I did let it set over night before I applied the Jade just to be on the safe side, but it was unnecessary.
I painted the Jade over the white.
 I used Painter's Tape to tape around my knobs as to not get paint on those. I wanted to replace them, but they ended up being to cumbersome to remove.


The Jade dried as fast as the Ivory.

I took a piece of sandpaper to distress the edges and let the white show through. However, I did not finish it because this is my craft desk and it would distress, scratch and ding up in time with as hard as I am on it.

I was able to move my supplies back on my desk rather quickly after applying the paint.
 I am so pleased with how it turned out. It really makes the desk pop and brings a smile to my face every time I walk into the room.
Until next time ~ Happy Crafting! 


Friday, June 22, 2018

How to Create 6 Cards from Compose Your Life Media Pack

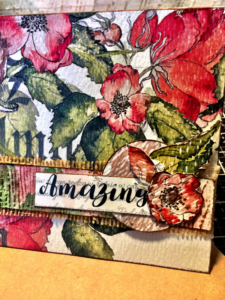
Sometimes I find it challenging to commit to a line of product. I want to play with it, but I do not want to invest in buying the entire thing. I adore the Media Packs from Canvas Corp Brands. Each pack comes with a variety of products without an overwhelming amount that drives the cost up. I always can get a lot of use from them. I was able to create six cards with leftovers in which I made Artistic Trading Cards.  The "Compose Your Life" line is a stunner! Not only are the images gorgeous, but they are printed on watercolor paper in which you can add your own touch. For this project I did pull in two additional sheets from the line, but not part of the pack to create the embellishments. I also used a few Tattered Angel Glimmer Mists from my stash on the textured wood paper as well as the tags.

Here are my cards and how I created them:
The additional two sheets of paper are Floral Spheres and Red Floral Pieces.
Using my Scan N Cut (You could fussy cut these too!) I trimmed out the flowers, leaves and circles.
I used the lovely paper in the pack to create my 5 by 5 inch card bases trimming each down to 5 by 10.
I used a score board to fold them in half.

The sentiments with this line are gorgeous.
I trimmed each out and inked the edges for the cards.
I misted the tags from the pack in coordinating Tattered Angel Sprays from my stash and set aside to dry.
I used Glam Glaze in the wood grain paper and inked it lightly to bring out the texture.
To assemble the cards I picked out bits and pieces for each card as I went.
I added pop dots to add a more interest and depth to the cards.
Here are the cards I created:


These would make a wonderful gift. I added the burlap from the pack and rose ribbon from my stash to bundle them together.
It is amazing how much use and fun you can have from the mixed media packs. Go to the shop and see if a line you have been curious about is available in a pack!

Until next time ~ Happy Crafting!

Thursday, February 22, 2018

Vacation Chunky Mini Album

One of my favorite things to do is travel. I love a good road trip! I often will go back to my home town. It is about a 12 hour drive and we have our favorite stops along the way. Half the fun is getting there! We love the journey. I created a mini album of our trips to California last summer. This is how I made the first page:
One of my favorite things is the tall base Architexture stickers from 7gypsies. They can double as a stencil and hold up nicely to sprays and paints. Here is where you can find all the supplies to make a mini album like this: Canvas Corp Brands Shop

I uploaded a video on my channel showcasing the rest of the album. Please check it out! 

Until next time ~ Happy Crafting!